
Salty Sam’s Fun Blog for Children
Post Number 21
Bird Boxes
Hello Everyone 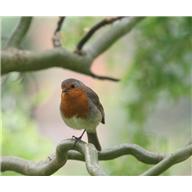
One of my hobbies is making things out of wood. lt is a really useful hobby because there are so many things that you can make: chairs, tables, shelves, cupboards, storage boxes.
l decided to make Auntie Alice some bird boxes for her birthday. She really likes having birds in her garden. l made her a bird table once. She put it outside her dining room window which means that while we are eating our meals inside, we can watch the birds outside eating theirs too! ![]()
Bird boxes are places where birds can make their home by building a nest inside; there they can feel nice and safe.
Then they lay their eggs in the nests and eventually baby birds hatch out of the eggs.
The parent birds work very hard to feed the babies by bringing food they collect back to the nest and in time the babies are big enough to come out of the box. This is called ‘fledging’ and the baby birds are called ‘fledglings’.
The fledglings stay around for a while because the parents are still feeding them – a little bit like teenagers! ![]()
They fly off when they have learnt to collect their own food and then they can become independent.
lf you buy a bird box or even make one yourself, there are some things you should remember…
Sometimes there are places where there is a lot of food for birds but no suitable places to live. Bird boxes are a substitute when there aren’t enough holes in the trees in that area. This often happens where there are a lot of young trees.
The kinds of little birds that like living in boxes are: blue tits, great tits, coal tits, nuthatches, robins and sparrows. lf the trees you want to put your boxes up in don’t belong to you, you should ask permission.
Boxes for owls are much bigger.
Tits like nesting in boxes with little entrance holes and it is a good idea to add a little metal plate to the rim of this hole so that woodpeckers can’t peck into the sides of the holes in an attempt to get at the babies inside.
You should place nesting boxes 2-4 metres off the ground facing north east to avoid hot sun and the wettest winds. (This is different in Australia, New Zealand and South America.) Tilt the box forward a little so that heavy rain can’t drip inside.
Put your boxes up in the autumn. The birds will get used to seeing them and may decide to use them when they are looking for a place to nest in the spring.
Make sure that you put the boxes up with string or wire and not nails if you are putting them up on a tree. This is so that the tree’s bark will not get damaged. You can also pad the string or wire with tights or a rubber hose so that it doesn’t bite into the bark. The fixing needs to be replaced every 2-3 years as the tree grows but of course this will not be necessary if you put your boxes on a fence or wall.
The boxes need to be cleaned out every year so remember where you put them! Clean them out in August (when there is nobody living there) using very hot water.
Most important of all don’t be tempted to look inside when there are birds living there because they will be upset!
Happy bird watching! ![]()
Bye bye everyone – don’t forget to subscribe to my blog!
Love and kisses
Salty Sam

www.christina-sinclair.com

Bill and Bob’s Joke of the Week![]()
![]()
Bill: What do you get when you cross a crow with a madman?
Bob: l don’t know. What do you get when you cross a crow with a madman?
Bill: A raven lunatic!

Salty Sam © Christina Sinclair 2015
Unauthorized use and/or duplication of material from this blog without express and written permission from this blog’s author and owner is strictly prohibited.
Links may be used to www.christina-sinclair.com

Picture Gallery

A great tit
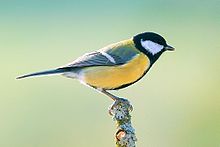 A great tit
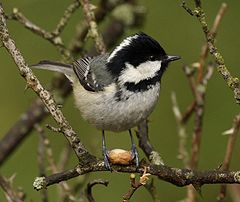 A coal tit
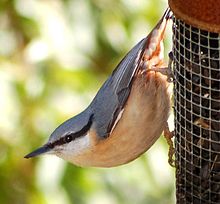 A nuthatch
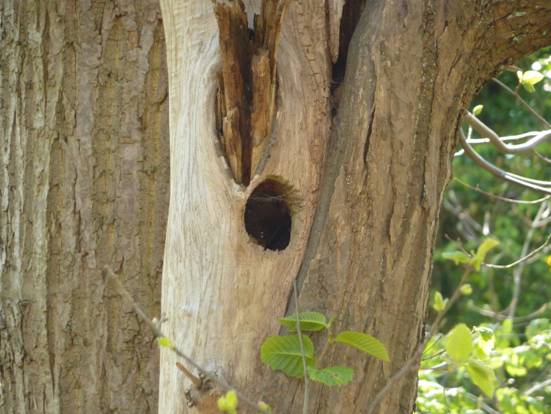 A natural place for birds to nest is a hole in an old tree
 Some birds like wrens and robins like their nests to be surrounded by foliage
This climbing plant is called old man’s beard because it has fluffy seed heads
 Honeysuckle is a climbing plant which has sweet-smelling flowers
 Bird homes for purple martins
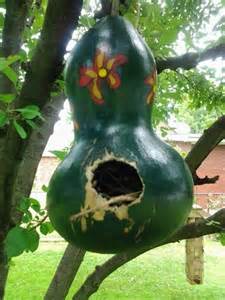 A nest in a gourd skin – a gourd is a fruit that often has a hard shell
 You can use all sorts of objects to encourage birds to nest in your garden


 THE SALTY SAM NEWS DESK

You may like to know that Bob has made a full recovery after his tumble last week.
He was perfectly fit to go tree climbing again this week.
Let’s hope he is more careful in future!


The Tree Council is the UK’s lead charity for trees, promoting their importance in a changing environment. It was founded as the national tree planting campaign that would follow up the success of the Plant a Tree in ’73 campaign.
If you would like to buy a tree poster for your wall, you can visit their shop at:

Please tell all your friends on ![]() and
and 
about my blog.![]()
Thank You!

Auntie Alice has been very busy knitting this week. She has designed a doll that is very easy to make for all you knitting newbies out there. It is made from only five rectangles of knitting but even so has got quite a lot of character.
You will need to be able to do the purl stitch as well as the knit stitch because the doll is made using stocking stitch knitting.
Next week there will be more information about how to make the hair and after that there will be clothes to make for her.
NEWSDESK MINIMAKE
A KNITTED DOLL

DOLL BODY (KNIT ONE)
Using 4mm knitting needles and white dk yarn cast on 40 stitches
Knit 2 rows of garter stitch
Stocking stitch 50 rows
Cut off yarn leaving about 30cm/12 inches to put through your stitches
- Sew up the back seam from the bottom with right sides together.
- Turn right side out.
- Over-sew along the bottom with wrong sides together keeping the long seam in the centre of the doll’s back.
- Stuff carefully and evenly.
- Pull in the top.
- Using a yarn needle take the yarn down inside the doll to 8cm/3¼ inches from the top of the back seam.
- Wrap the yarn tightly round the neck a couple of times and fasten the yarn securely but don’t make the neck so small that the head flops over.
TIP
You can incorporate a lolly stick or pencil stub into the neck as you stuff to give it more rigidity. If you don’t do this, the weight of the hair will cause the head to flop.
DOLL ARM (KNIT TWO)
Using 4mm knitting needles and white yarn cast on 14 stitches
Knit 2 rows of garter stitch
Knit 22 rows of stocking stitch
Cut off about 20cm/8 inches of yarn and pull through stitches
- Sew up end and side seam right sides together.
- Turn right side out.
- Stuff carefully and evenly using small amounts of stuffing at a time.
- Divide some stuffing up into two even piles before you start to help you get two arms that look the same.
- Pull the end shut.
- Using a yarn needle take the yarn up inside the long seam and pull out 2cm up from the bottom of the seam.
- Make a wrist 2cm up from the bottom by wrapping the yarn around the arm a couple of times.
- Pull the yarn tight and fasten off.
- When you make the second hand check that it matches the first.
DOLL LEG (KNIT TWO)
Using 4mm knitting needles and white yarn cast on 20 stitches
Knit 2 rows of garter stitch
Knit 30 rows of stocking stitch
Cut off about 20cm/8 inches of yarn and pull through stitches
- Sew up bottom and side seam right sides together.
- Turn right side out.
- Stuff carefully and evenly using small amounts of stuffing at a time.
- Divide some stuffing up into two even piles before you start to help you get two legs that look the same.
- Pull the end shut.
- Using a yarn needle take the yarn up inside the long seam and pull out 3cm up from the bottom of the seam.
- Make an ankle 3cm up from the bottom by wrapping the yarn around the arm a couple of times.
- Pull the yarn tight and fasten off.
- When you make the second foot check that it matches the first.
TIP
Slip the first stitch of every row to give a neat edge to your knitting.
TO MAKE UP
- Position the arm seams at bottom of the arms when you attach them to the doll.
- Position the leg seams between the legs when you attach them to the doll.
- Pinch the body at the top of the side and laying the arm across the doll’s chest sew into place using over-sew stitch.
- The seam will be at the back of the top of the arm.
- Leave a shoulder between the top of the arm and the neck.
- Lay one leg across the doll’s stomach and using white yarn and over-sew stitch sew across the top of the leg and the bottom of the body with the doll’s back facing you.
- Then sew across the top of the other leg.
- Embroider a face onto the doll using coloured yarns taken in from the back or top of the head.
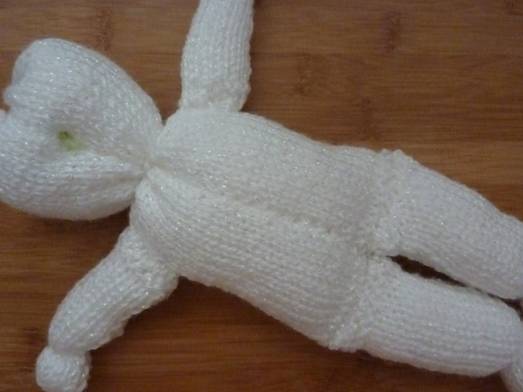
Keep the long seam at the back of the body

Sew the arm and leg joints from behind
In blog posts to come there will be knitting patterns for clothes for you to make for your doll.
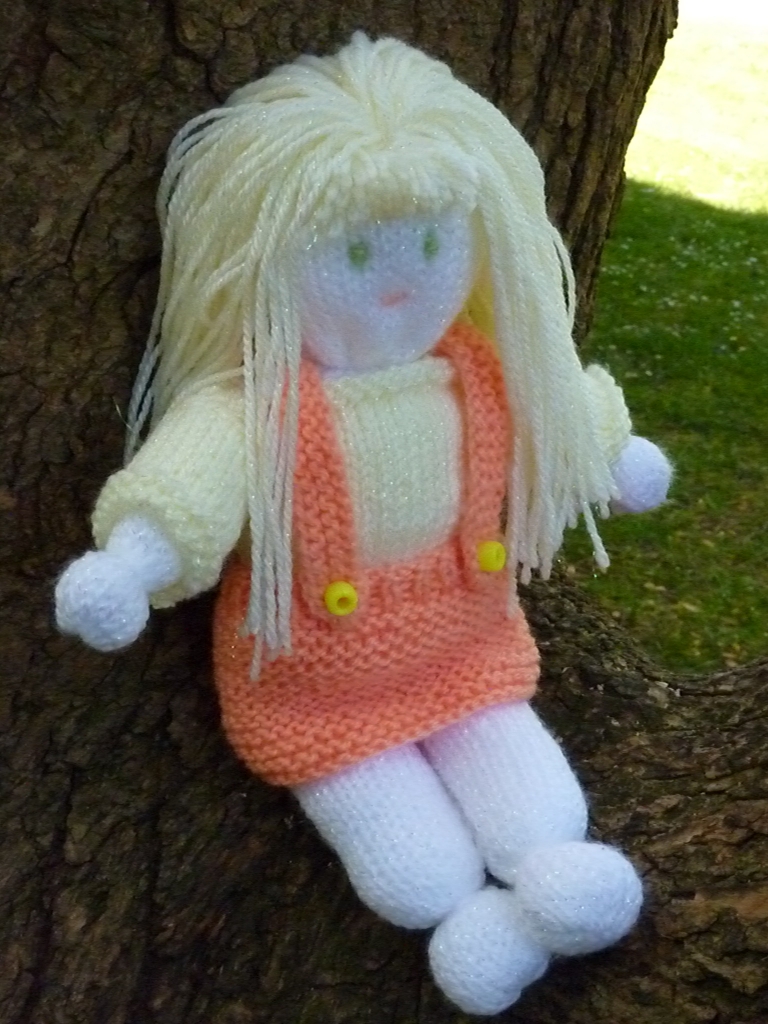
You may want to buy a few balls of yarn so that you can make her a colour co-ordinated wardrobe or you may want to start collecting left-over balls of yarn because you won’t need much yarn to make the outfits.


lf you would like to see lots of interesting pictures of bird houses including some you can make with recycled materials, check out my Nature Board at:
https://www.pinterest.com/TheSaltySamBlog/nature/

*********************
TO ADVERTISE ON THIS BLOG
PLEASE CONTACT:
christina.sinclair.ads@aol.co.uk
*********************


Hobby Time
l like making things out of wood – this hobby is called carpentry.
Do you know what these hobbies are?
- philately
- twitching
- herping
- sculpting
- archery
- genealogy
- lapidary
- bonsai
- paintballing
- parkour


BLOW MY FOGHORN!!!
PLUS
Salty Sam fans can join in with their comments and share them with children all over the world. You will need permission if you are not an adult.
Enter your e-mail address to subscribe to my blog and receive new Salty Sam Blog Posts for free by e-mail every week. Your address will be kept private and will not be shared with any third party.
Sign me up at the side bar


lt’s the Weekend!

HOW TO MAKE A BlRDS’ DEPARTMENT STORE
There are lots of places where you can find out how to make nesting boxes if you are good at woodwork (or you have a kind uncle that is ![]() ), or of course you can buy them ready made.
), or of course you can buy them ready made.
(For example check out) www.lincstrust.org.uk
But if you can’t manage to make a bird box you can easily make a birds’ department store.

In the spring time, the birds often like to line their nests with soft material when they have finished building them. The lining cushions the eggs, insulates them and holds them together in a clutch.
 A bird’s nest built high up in a tree
You can spend the months before this time collecting scraps to put in your department store.
You can use
Dog hair or any other pet hair
Human hair
Kapok
Cotton wool
Feathers
Little scraps of felt and yarn or string left over from crafting
Dried grass
Cut up sticks from bouquets of flowers once they have dried
Used dental floss pulled apart a little
But NEVER plastic mesh from orange and Satsuma bags because it can get wrapped around the little birds’ legs and is very dangerous for them.
You can have as many departments as you have room for; one juice box for each department.

Secure the lids so the rain doesn’t get in and make the materials soggy.
Cut a hole on the wide side of the box big enough so that the birds can pull out the materials (you may need an adult to help you with this). Tape or glue the boxes together in a row and tape or glue onto a base made out of a large piece of cardboard or very thin piece of wood. This will create a shelf under the holes so that the department store doesn’t fall or blow over. Also any materials that fall out of the holes will rest on the base (then the birds will see what they have dropped).
Next put your department store up off the ground onto a flat surface somewhere so that you can see it from your windows. You could also hang it from a branch or washing line (unless you garden is very windy).

If you wanted to make it really special, then you could paint it to make it look like a row of shops with signs above the holes telling the birds what each shop contains. The juice boxes that have pointed tops would look as though they had roofs.
It will be interesting to see which birds favour which materials for their nests.

TIPS
Duct tape is good to use if you want to use a waterproof tape for outside and if you want to paint the juice boxes, mix a little PVA glue and water in with your paint to help it stick to the shiny surfaces.
Then you can start collecting for next year’s store!

Please note that the material on this blog is for personal use or for use in classrooms only.
It is a copyright infringement and, therefore, illegal under international law to sell items made with these patterns.
Use of the toys and projects on all of these blogs is at your own risk.
©Christina Sinclair Designs 2015


Hobby Time
- philately – studying and collecting stamps
- twitching – bird watching (you must never collect eggs from the wild)
- herping – searching for reptiles (you must not take them home)
- sculpting – making statues
- archery – shooting at targets with a bow and arrow
- genealogy – tracing the histories of families
- lapidary – polishing stones
- bonsai – the Japanese art of growing miniature trees
- paintballing – shooting people with a paintball gun
- parkour – quickly moving over obstacles in an urban environment in various ways
 Archery
 Lapidary
 Bonsai
 Parkour (Free running)

Wildscreen Arkive
have some wonderful films about nature
Checkout:
http://www.arkive.org/goldfinch/carduelis-carduelis/videos.html


I appreciate, cause I found exactly what I was looking for. God Bless you man. Have a nice day. Bye
I just like the valuable info you supply in your articles. I will bookmark your blog and take a look at again here frequently. I am rather certain I’ll learn lots of new stuff proper here! Good luck for the next!
I’m planning to bookmark your blog post . You definitely come with beneficial writings. With thanks for revealing your website page.
Thank you everyone for writing in!
Hello Salty Sam
We have bird boxes in our garden and we get birds in them every year.
That is lovely to hear Celia! The birds must be very grateful to you. 🙂
I love your blog Salty Sam
Thank you very much Kayla!
Your style is so unique in comparison to other people I’ve read stuff from. Many thanks for posting when you have the opportunity, Guess I will just book mark this blog.
Way cool! Some very valid points! I appreciate you penning this write-up and the rest of the website is very good too.
Thank both you very much.
Really like your stuff, thanks for sharing
Thank you so much for writing in Chris. l really appreciate your support.
And l am glad you like my blog. 🙂