Salty Sam’s Fun Blog for Children
Number 261
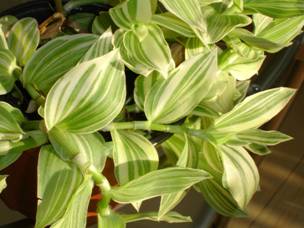
Tradescantia
Hello Everyone
You may recall that several weeks ago, Auntie Alice gave Emily some little plants to keep in her bedroom. (Blog Post 237).
Well, they have grown to be quite big now and this week Auntie Alice said that she could find another plant for Emily to have that would grow easily from a cutting too.
The plant had lovely green and white striped leaves and would trail down from her bedroom shelf as it grew.
The plant was called Tradescantia.
Emily said that that was a long name to remember and Auntie Alice said that the plant had such an unusual name because it was named after a man who had the surname Tradescant.
He lived a long time ago.
And because Auntie Alice likes telling stories – just like l do – she told Emily the story of the Tradescants.
John Tradescant the Elder (born in the 1570s, probably in Suffolk) and his son John Tradescant the Younger (born in 1608) introduced many new plants to English gardens.
Tradescant the Younger went to visit the Eastern coast of America three times to collect plants from what was then called the New World – because it hadn’t long been discovered.
One of these plants brought back to England in 1629 was the Tradescantia.
His father was also a traveller but started his career as head gardener in a famous place called Hatfield House.
This is a house that you can visit today.
One of his duties was to go to the Low Countries which are just across the Channel in Europe to buy some fruit trees. He would later travel to Russia and Africa too where he collected seeds and bulbs.
He put together a collection of curiosities of natural history in a large house in Lambeth just south of the Thames in London. Many of these strange and unusual things were given to him by other collectors. He called the cabinet of curiosities ‘the Ark’.
The house became the first museum open to the public in England.
(There is still a Tradescant Road [off South Lambeth Road] that marks the old boundary of the Tradescant Estate.)
He went on to become a very successful garden designer to nobility, and later to the King himself in 1630.
His son, John Tradescant the Younger, was born in Kent and was also a botanist (a person who studies plants) and a gardener.
He travelled far and wide to collect seeds and plants to grow in English gardens.
He brought back magnolias, phlox and asters from America. He also added several things that he picked up as souvenirs from travelling to the Ark.
When his father died he became head gardener to Charles l.
The two men were buried in the churchyard of St-Mary-at-Lambeth. This churchyard is now in the Museum of Garden History. ln the Museum you can see how the history of gardening developed and some of the tools people used in past times.
This is a museum that you can visit today. lt is near Vauxhall Bridge.
Anyway, l am pleased to say that Emily’s new plant is doing as well as her other ones.
Bye bye everyone – don’t forget to subscribe to my blog!
lf you like my blog, please support it by telling all your friends and followers about it.
Thank you!
And see you again next Fun Friday!
Love and kisses
Salty Sam

www.christina-sinclair.com

Bill and Bob’s Joke of the Week![]()
![]()
Bill: Did you hear about the explorer who found and enormous brick chimney in the middle of the desert?
Bob: No, what happened?
Bill: The builder had got the plans upside down. lt should have been a well!
Salty Sam © Christina Sinclair 2015
Unauthorized use and/or duplication of material from this blog without express and written permission from this blog’s author and owner is strictly prohibited.
Links may be used to www.christina-sinclair.com
Picture Gallery
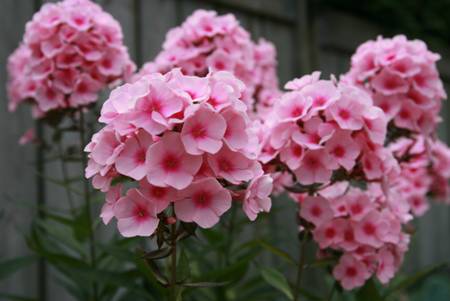 Phlox
Phlox
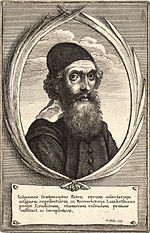
The Elder
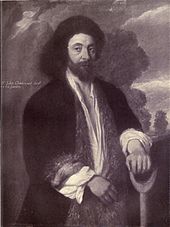
The Younger
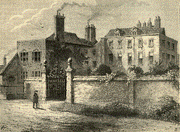
Tradescant’s House, Lambeth
 THE SALTY SAM NEWS DESK

This week Auntie Alice was asked to organize a Valentine’s Day party for the old folks in the village hall.
She doesn’t see herself as an old folk herself. She says that she is far too busy to get old.
And in any case, no one is ever too old to be romantic.
She needed some decorations in a hurry to make the dance floor more festive and so she and Emily set to work to make some bunting to hang up from the rafters in the hall.
And now here is the clever part; they used up all the junk mail that had collected in Auntie Alice’s recycling bin.
Gladys Friday gave them all her old brochures and leaflets from last summer season that she had in the Rocky Bay Tourist Information Office and they set to work.
They cut the paper into triangles of the same size by using a cardboard template. The template actually looked like a diamond because it had to be two long triangles back to back.
Then they folded the triangles in half lengthways and punched heart shapes into the paper. So many holes were cut into the triangles that the pictures couldn’t really be seen anymore – just a lot of colours.
By the time the bunting was hung up and the lights were turned down to create a romantic mood you couldn’t tell that it was made out of all that annoying junk mail that gets delivered all the time!
And after the party, the bunting will be shredded and put onto Auntie Alice’s enormous compost heap. You shouldn’t really put a lot of shiny paper on a compost heap but it doesn’t really matter so much when your heap is as big as Auntie Alice’s.

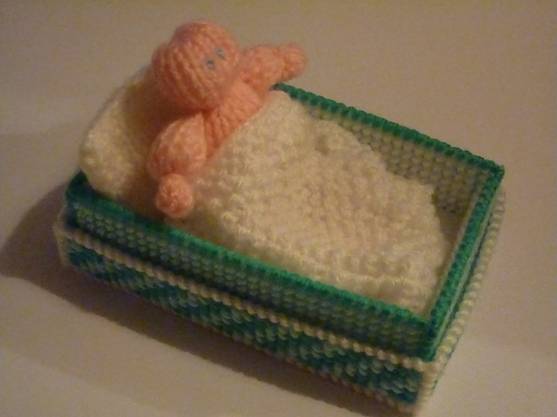
Then because Emily had become such a big help to Auntie Alice she made her a little toy to take home with her.
Emily wanted to keep all the little heart shapes that had been cut out as confetti. I don’t know what she will use that for. She is still thinking about it.
I expect you would like to have the pattern for this new toy so here it is…
NEWSDESK MINIMAKE
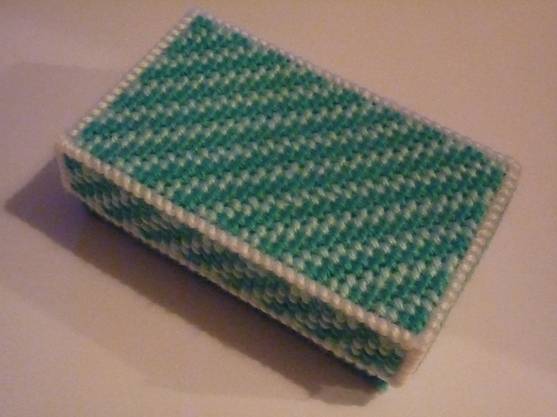
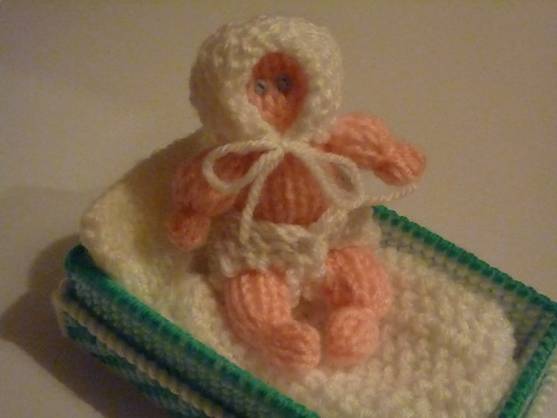
A BABY IN A CRIB
BABY CRIB
You will need 1 sheet of 7 plastic canvas mesh 10.5 by 13.5 inches/26.7 by 34.3cm
Cut the following outside panels and decorate with tent stitch
- In diagonal stripes in light green and dark green as per the photograph on the lid
- Just light green on the base:-
20 holes x 33 holes – top of lid – 1 panel
33 holes x 6 holes – sides of lid – 2 panels
20 holes x 6 holes – ends of lid – 2 panels
18 holes x 31 holes – bottom of base – 1 panel
31 holes x 8 holes – sides of base – 2 panels
18 holes x 8 holes – ends of base – 2 panels
Cut the following inside panels for the base and decorate with tent stitch in white dk yarn:-
16 holes x 7 holes – sides of base – 2 panels
29 holes x 7 holes – ends of base – 2 panels
Cut the following inside panels and leave plain:-
18 holes x 31 holes – top of lid – 1 panel
31 holes x 5 holes – sides of lid – 2 panels
18 holes x 5 holes – ends of lid – 2 panels
16 holes x 29 holes – bottom of base – 1 panel
TO MAKE UP
- Sew the sides of the base to the bottom of the base and sew up the corners in dark green yarn
- Sew the sides of the lid to the top of the lid and sew up the corners using white yarn
- Sew the inner side panels to the inner lid using white yarn but don’t sew up the corners
- Sew the inner side panels to the inner base using white yarn but don’t sew up the corners
- Push these inner skins into the lid and base and sew along the rims to sew the inner skin to the outer using white yarn on the lid and dark green yarn on the base – sew into just one hole in the outer skin each side as you go because the inner panels are two holes smaller than the outer side panels
Then cut a piece of felt to line the base of the crib.
Closed box
BABY BODY (KNIT ONE)
Using 4mm knitting needles and pink dk yarn cast on 14 stitches
Knit 18 rows in stocking stitch
Don’t cast off – cut off the yarn leaving a length of about 20cm/8 inches to thread into the stitches and then pull the end of the knitting into a round shape
BABY ARMS (KNIT TWO)
Using 4mm knitting needles and pink dk yarn cast on 8 stitches
Knit 6 rows in stocking stitch
Don’t cast off – cut off the yarn leaving a length of about 20cm/8 inches to thread into the stitches and then pull the end of the knitting into a round shape
BABY LEGS (KNIT TWO)
Using 4mm knitting needles and pink dk yarn cast on 8 stitches
Knit 12 rows in stocking stitch
Don’t cast off – cut off the yarn leaving a length of about 20cm/8 inches to thread into the stitches and then pull the end of the knitting into a round shape
TO MAKE UP
- Sew up the back seam of the body right sides together and then turn right sides out
- Sew up the bottom seam of the body wrong sides together
- Sew up the leg inside seams with right sides together
- Turn the legs the right way out
- Bind yarn tightly around the bottom of the legs to make ankles
- Lightly stuff the leg and sew the tops onto the bottom of the body by laying the legs onto the stomach and sewing from behind
- Sew up the under arm seams with right sides together
- Turn the arms the right way out
- Bind yarn tightly around the arms to make wrists
- Lightly stuff the arms and sew the tops onto the sides of the body by laying the arms onto the chest and sewing from behind
- Stuff the body and bind some yarn tightly around the body above the arms to make a neck making sure that you secure the yarn so that it won’t undo
- Close up the top of the head
- Sew the eyes onto the front of the face using blue dk yarn – make the eyes with French knots (wind the yarn around the needle twice)
NAPPY (KNIT ONE)
Using 4mm knitting needles and white dk yarn cast on 22 stitches
Knit 2 rows in garter stitch
Continue knitting in garter stitch decreasing 1 stitch at the beginning of every row until you have 1 stitch left and cast off
BONNET (KNIT ONE)
Using 4mm knitting needles and white dk yarn cast on 16 stitches
Knit 14 rows in garter stitch
Don’t cast off – leave the stitches on a length of yarn so that you can take them off your needle and pull these stitches tight to make them the back of the bonnet
Secure 10cm of yarn to each bottom front corner of the bonnet to enable you to tie the bonnet up under the chin
*Of course you can make any colour of baby and clothing that you like.
COT PILLOW (KNIT TWO)
Using 4mm knitting needles and white dk yarn cast on 14 stitches
Knit 10 rows of stocking stitch
Cast off
TO MAKE UP
Sew the pillow up along the edges with wrong sides together using over-sew stitching
Lightly stuff just before sealing up
COT BLANKET (KNIT ONE)
Using 4mm knitting needles and white dk yarn cast on 19 stitches
Knit 2 rows of garter stitch
Slip 1 (knit 1, purl 1) repeat these last 2 stitches to the end
Repeat the last row 27 times (28 rows of moss stitch)
Knit 2 rows of garter stitch
Cast off
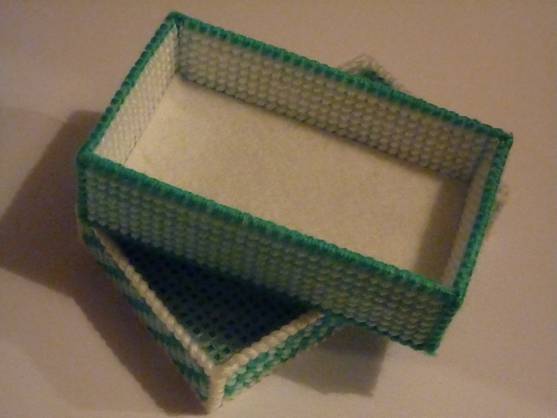
The base has plain sides and the lid has diagonal stripes on it

*********************
*********************

Quick Quiz
You know that many different fruits grow on trees, but there are products that we can get from the juices that come out of the trunk as well!
Can you work out this puzzle?
Products from tree trunks…
- R _ b _ e _
- M _ p _ e s_ r _ p
- P _ l _ s _ r _ p
- B _ r _ h j _ i _ e
- R _ s _ n

lt’s the Weekend!

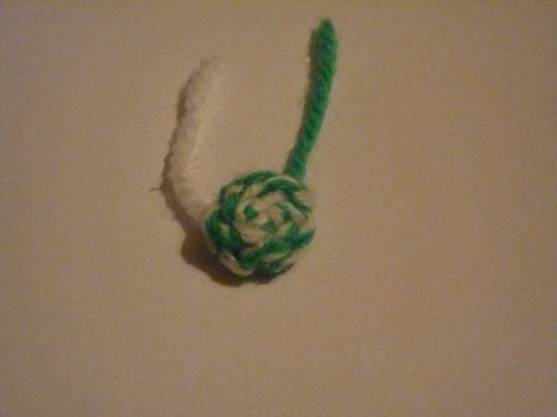
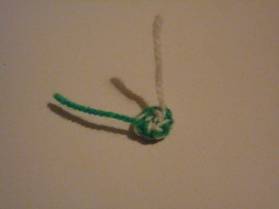
HOW TO MAKE A TWO-TONED BUTTON
This is very simple to do.
If you have knitted a garment that needs buttons and you have been unable to find buttons to match the colour of it, this is a quick way to make your own buttons.
Knot two strands of yarn together and crochet 5 chains into it to make a small button and 10 chains into it to make a large button.
Leave yourself long lengths of yarn to use for sewing up when you finish the crocheting.
Curl your finished work around and sew across the spiral again and again using a yarn needle until it becomes solid and holds together well.
Leave two strands at the back of the button that you can use to sew the button onto your garment.
If you want to try and make a button with three colours, the button will be much thicker.
Please note that the material on this blog is for personal use and for use in classrooms only.
It is a copyright infringement and, therefore, illegal under international law to sell items made with these patterns.
Use of the toys and projects is at your own risk.
©Christina Sinclair Designs 2015
Quick Quiz Answers
- Rubber
- Maple syrup
- Palm syrup – like a sweet caramel
- Birch juice – to make a fermented drink
- Resin
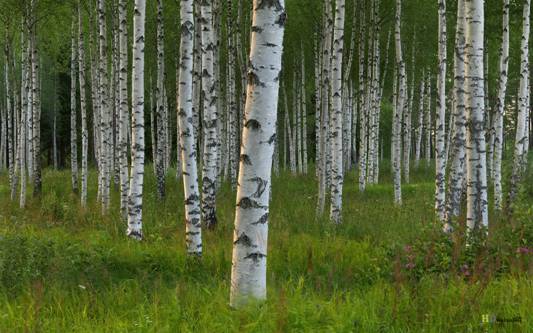
Birch trees
For an Embroidery Stitches Chart
Check out Blog Post 3