
Salty Sam’s Fun Blog for Children
Number 240
Cut-and-Come-Again Lettuce
Hello Everyone

You may remember that some while ago Bill and Bob’s dad made them a vegetable plot in their back garden.
He used some reclaimed timber to make a raised bed.
Beds like this are easy to work in and easy to weed.
The soil he put into it was really nice and the boys’ crops grew well in it.
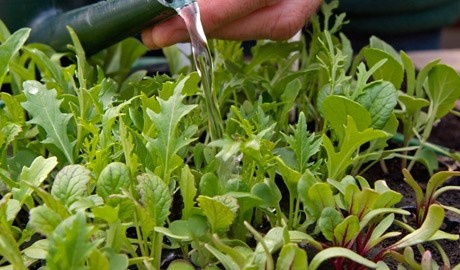
One of the most successful crops in Bill and Bob’s vegetable plot has been cut-and-come again lettuce.
These are plants that continue to grow when you have taken off some of the leaves to eat.
These salad leaves are tasty and nutritious, quick and easy to grow.
Because you can harvest the leaves from each plant three or four times they provide a bumper harvest for the space they take up. They are a perfect crop for children to grow because they are very colourful, grow quickly and can regenerate in a seemingly magical way.
Bill and Bob found that sowing directly into the soil was a simple and cheap way to grow vegetables. Soil preparation is the first step to reaping a good harvest.
The depth they needed to plant the seeds at was printed on the on the packet. The general rule is to make a seed drill three times the depth of the dimension of the seeds you are planting. A drill is a long but shallow trench you tuck the seeds into.
ln order to sow their seeds in a straight line they used a long cane to guide them but you can also use a taut piece of string wrapped around two sticks pushed into the ground each end of your drill to act as a guide. lt is much easier to tell weeds from your seedlings if you grow them in a straight line like this. A crop will have identical leaves; the weeds will probably have many different leaf shapes.
ln the spring time, you may be eager to get out in the garden to start sowing your seeds but you must not sow into cold, wet soil. You must wait until the weather improves. Every spring is different and spring comes to different parts of the world at different times, so it is very difficult to say exactly when to sow seeds.
lf salad crops are planted too early and the weather becomes very cold, they will bolt. That means that they will grow tall and leggy.
Water the seeds with a fine rose on your watering can; a torrent of water will wash them away.
lf you plant plugs that are either shop-bought or home-grown instead of seeds like Bill and Bob used, your crop will get off to a better start when planted outside and you won’t have the job of thinning your seedlings which will save time and wastage. Space the plugs in a way that will give them plenty of room to grow.
lt is still important for you to keep the plot clear of weeds so that your salad plants don’t have to compete with them.
Bill and Bob divided the packet of seeds into three or four small envelopes and put them back into the seed packet so that they wouldn’t forget what seeds they were. Then they planted each batch every week for three or four weeks. This is called succession sowing and will give you a longer harvesting season rather than a glut at one time.
When the salad leaves began to sprout they got very excited and when the leaves were big enough they had no trouble in remembering to cut the salad leaves regularly to encourage more growth.
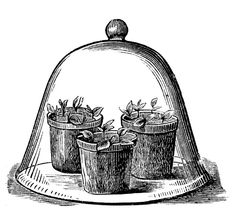
lt is important to remember to protect your seeds and tender, young plants from cold winds, mice and birds with cloches. These mini greenhouses will trap the Sun’s warmth which will encourage germination and growth.
Proper cloches can be quite expensive to buy – especially if you need quite a lot of them so you can make your own using clear fruit boxes turned upside down and pressed into the soil.
The wonderful thing about salad crops is that they can be grown through the winter and early spring in a greenhouse or cold frame.
lf you have no garden, you can grow cut-and-come-again salads in a box or large flower pot on a window sill in a cool room. ln this way they can be grown through the summer and the winter. lt will be small and manageable and easy-to-grow crop.
So what crops are there to choose from?
The crops to choose for the winter months could be colourful loose-leafed lettuces, salad rocket, oriental mustards, mizuna, land cress, lamb’s lettuce or pak choi.
ln the summer, in addition, you can grow baby spinach, mibuna and kale. ln summer your plants will take about four weeks to grow good-sized leaves but when the days are shorter probably about six.
lf you don’t know these names, it doesn’t really matter because you will find them on seed packets when you go to buy them. Look to see if the taste is described as mild and sweet or strong and tangy.
Some of them you will like more than others so remember which ones you will especially like to grow again.
The leaves can be used in salads, sandwiches, stir fries and home-made soups so you can easily take your own crops to school in your packed lunch!
The sweeter varieties rather than the spicier ones might be a better choice for children. But if any turn out to be too strong for you, just put them in a sandwich with cheese and tomato to sweeten the taste.
The smaller the leaf when harvested, the sweeter it will be. Left to grow bigger, the taste will be stronger.
Harvest with scissors so that you will take only the leaves you want and not damage the others. Water the stalks, and new shoots will soon start to appear. After a few harvests the plants won’t re-grow, but if you have employed succession sowing you should have a new crop ready to harvest by then anyway.
Then you can plant more seeds next year.
And if you have a compost heap in your garden, you will have compost to put the goodness back into the soil so that you can continue to grow healthy crops every year.
Make sure that you wash everything that you take from the garden thoroughly before you eat it or put it into green juices. lt won’t be peasant to find a slug in your sandwiches and it may be extremely harmful to your health as well if you eat something that you shouldn’t!
Bye bye everyone – don’t forget to subscribe to my blog!
lf you like my blog, please support it by telling all your friends and followers about it.
Thank you!
And see you again next Fun Friday!
Love and kisses
Salty Sam

www.christina-sinclair.com

![]()
Bill and Bob’s Joke of the Week![]()
![]()
Bill: Where did the lettuce go to have a few drinks?
Bob: l am not sure.
Bill: The salad bar!

Salty Sam © Christina Sinclair 2015
Unauthorized use and/or duplication of material from this blog without express and written permission from this blog’s author and owner is strictly prohibited.
Links may be used to www.christina-sinclair.com

Picture Gallery
 Cut and come again lettuce
 Salad lettuce
 Cloche
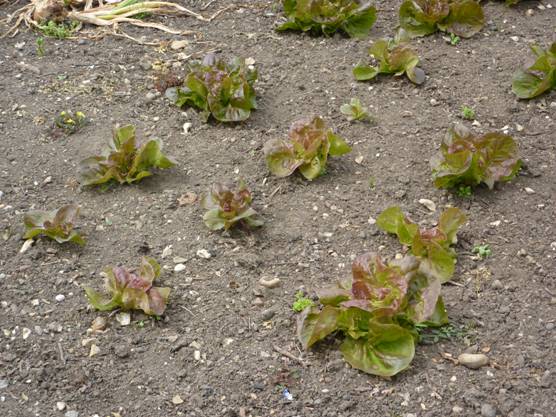 Lettuces need room to grow
![]()
 THE SALTY SAM NEWS DESK

One thing that Auntie Alice is keen to do is collect seed from her plants in the garden. Because she has such a large garden and a lot of plants in it, it saves her an absolute fortune to collect and store seed for it.
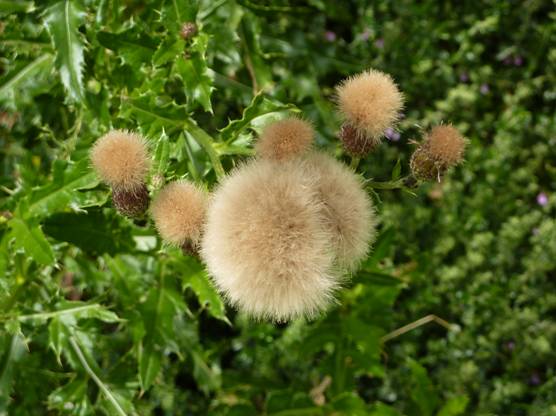
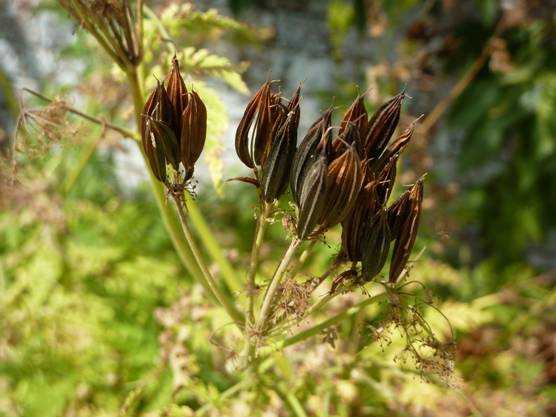
Thistle seed
Of course, she is always tempted to go down to the Rocky Bay Nursery a few times a year where she always spends more money than she planned to – but even so, collecting her own seed helps her to fill her garden with beautiful flowers and her vegetable patch with tasty things for the kitchen.
There are a few important things that you should remember if you want to collect your own seed.
Firstly, you must collect it when it is really ripe, which often means when it is brown. But of course you must catch it before the plant drops it on the ground.
You must collect it on a dry day and put the seed in a paper bag or envelope – and of course you can buy really big envelopes if you have a lot of seed to store.
You don’t want to use plastic bags because the seed must be kept as dry as possible and plastic can retain moisture. You don’t want your seeds to go mouldy.
Label every bag or envelope as you go, otherwise you could get confused.
Write on the side or even staple an old seed packet to the top, if you have one, to remind you what you have in store.
![]()
If you have tomato seeds to store, squash them and spread them over some kitchen paper and leave them to dry completely.
You can cut around the seeds later and plant them still on the paper. The paper will dissolve away in the soil.
Store all your seeds in a dry shed – maybe in wooden drawers if you have them.
Instructions for planting seeds can be found in books and online so you could write them on the side of your bag or envelope during the winter and get everything into order so that you can organize a planting calendar for the following spring.
Auntie Alice is busy in her garden all summer but there are things to do in the winter too!
 Auntie Alice

*********************
TO ADVERTISE ON THIS BLOG
PLEASE CONTACT:
christina.sinclair.ads@aol.co.uk
*********************

Quick Quiz
Fill in the gaps to find things that are green…
K _ R _ l _
G _ A _ S
A _ O _ A _ O
E _ E _ A _ D
P _ R _ L _ Y
L _ M _
O _ l _ E


![]()
lt’s the Weekend!

HOW TO MAKE A KNlTTED GlFT BAG
If you need a little gift bag in a hurry and the shops are shut, this gift bag is very quick to knit.
The bags would look lovely sitting on a plate at a special dinner.
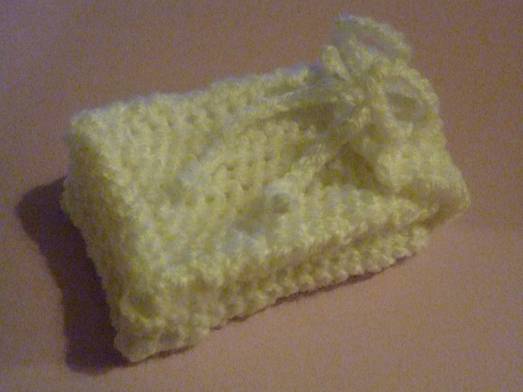
You could knit them in white for a wedding…
Pink for St Valentine’s Day
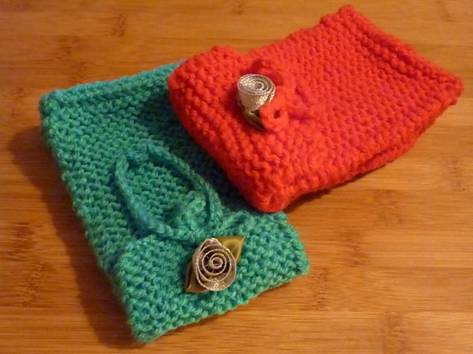
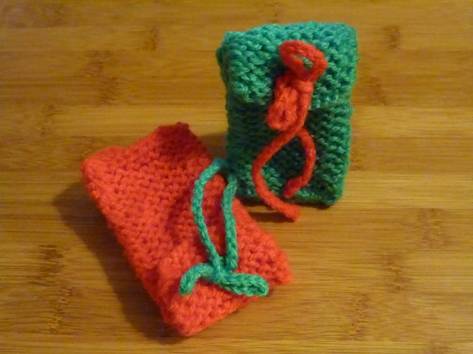
Red and green for Christmas
Rainbow yarn for an interesting look
GIFT BAG BASE (KNIT ONE)
Using 4mm knitting needles and dk yarn cast on 10 stitches
Knit 10 rows of garter stitch
Cast off
GIFT BAG FRONT FLAP (KNIT ONE)
Using 4mm knitting needles and dk yarn cast on 10 stitches
Knit 14 rows of garter stitch
Cast off
GIFT BAG SIDES (KNIT TWO)
Using 4mm knitting needles and dk yarn cast on 6 stitches
Knit 30 rows of garter stitch
Cast off
GIFT BAG BACK AND FRONT (KNIT TWO)
Using 4mm knitting needles and dk yarn cast on 10 stitches
Knit 30 rows of garter stitch
Cast off
TO MAKE UP
Sew the panels together with wrong sides together to enable the bag to stand up
Crochet 70 chains into a length of yarn and tie through the front panel and the flap to tie the bag shut
This is the larger version…
LARGE GIFT BAG BASE (KNIT ONE)
Using 4mm knitting needles and dk yarn cast on 16 stitches
Knit 14 rows of garter stitch
Cast off
LARGE GIFT BAG FRONT FLAP (KNIT ONE)
Using 4mm knitting needles and dk yarn cast on 16 stitches
Knit 20 rows of garter stitch
Cast off
LARGE GIFT BAG SIDES (KNIT TWO)
Using 4mm knitting needles and dk yarn cast on 10 stitches
Knit 44 rows of garter stitch
Cast off
LARGE GIFT BAG BACK AND FRONT (KNIT TWO)
Using 4mm knitting needles and dk yarn cast on 16 stitches
Knit 44 rows of garter stitch
Cast off
TO MAKE UP
Sew the panels together with wrong sides together to enable the bag to stand up
Sew an adornment/decoration onto the front flap
Crochet 70 chains into a length of yarn and tie through the front panel and the flap to tie the bag shut
Please note that the material on this blog is for personal use and for use in classrooms only.
It is a copyright infringement and, therefore, illegal under international law to sell items made with these patterns.
Use of the toys and projects is at your own risk.
©Christina Sinclair Designs 2015
![]()
Quick Quiz Answers
K E R M l T
G R A S S
A V O C A D O
E M E R A L D
P A R S L E Y
L l M E
O L l V E

Parsley