

Salty Sam’s Fun Blog for Children
Number 239
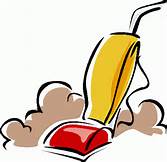
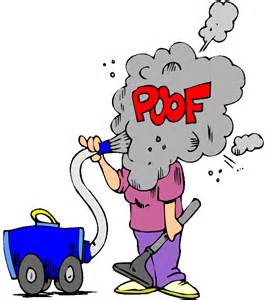
Vacuum cleaners
Hello Everyone
Captain Jack often goes around to Auntie Alice’s house for tea. They are very friendly.
One thing he really hates though, is when she vacuums the carpets when he is trying to have a snooze.
Or even worse – when he is trying to watch football on the television!
So she makes sure that she doesn’t do any vacuuming when he is around.
Vacuum cleaners are very useful – as you may well know if you have even dropped crumbs all over the floor.
But of course like any man-made invention they have not always been around.
Before they were invented, people took their carpets outside, hung them up and then had to beat them with something hard, maybe with a utensil called a carpet beater.
Some people only cleaned their carpets once a year – probably in spring when it was more possible to work outside after the cold winter.
Clouds of dust would be beaten out of the carpet and the poor person who had to do the job was probably coughing and choking as they worked.
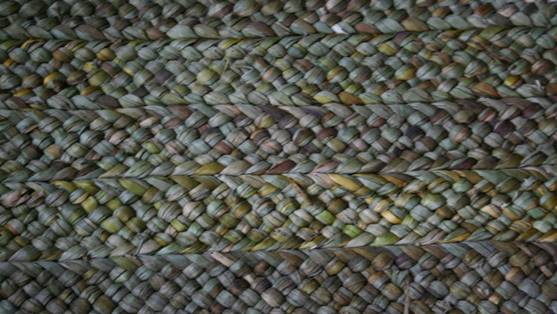
Before people had carpets, they used rushes to cover the floor, or stalks left over from removing husks and grain from cereal crops like wheat. (This process is called threshing.) There was a little barrier at the doorway to keep the stalks inside the house. This is where we get the word ‘threshold’ from.
Then people developed the craft of plaiting these materials and binding them together to make matting. New ones would be made every year to keep the house as fresh and clean as possible. Fragrant, dried herbs were put under the mats. The herbs were crushed when the mats were walked on and the fragrances released.
The first attempts to provide a mechanical solution to floor cleaning were started as early as 1599 in England but it would be many years before the development really started to become successful.
One of the first vacuum cleaners was so big, it had to be brought to the house on a horse-drawn carriage and parked out on the street! Hoses with nozzles on the end were passed in through the windows of the house by men in uniforms and people were so fascinated with the process, they had parties where they invited friends around to watch the spectacle.
The machine could only service very large houses, businesses and shops. lt wasn’t feasible to use it in small houses.
This machine was first powered by an oil engine and then later by an electric motor. lt was invented by a man called Hubert Cecil Booth in 1901 and it was called the Puffing Billy. The noise of it was so loud that it used to spook horses.
l think Hubert Cecil Booth sounds a wonderful name for an inventor and l would love to have seen the machine in action.
Apparently, he got the idea for his invention after seeing a machine that puffed dirt off train seats and he wondered if he could manage to make a machine that did the opposite – suck the dirt up and take it away.
The British royal family were very impressed, and the machine was used to clean the carpets of Westminster Abbey in preparation for the coronation of Edward Vll in 1901.
All the attention Hubert’s machine received, set other people thinking about how the concept could be developed.
Today, the company that Booth founded manufactures large machines for use in factories and businesses.
Before this, in 1899, John Thurman had invented a gasoline-powered carpet cleaner and started a horse-drawn door to door service in St Louis, USA.
lt was called a pneumatic carpet renovator. lt blew dust into a receptacle rather than sucked it into one.
Other people had ideas for machines that were a bit more manageable for people to use at home on their own – and the machines could be kept at home to use when ever somebody wanted to.
The first vacuum cleaner like this was called the Whirlwind. lt was invented in Chicago in USA in 1868 by lves W. McGaffey. lt was made out of wood and canvas.
The machine wasn’t very heavy but it was difficult to use because whoever used it had to turn a crank at the same time as pushing it across the floor. This was not an easy thing to do.
ln 1876, Melville Reuben Bissell invented the first successful mechanical ‘carpet sweeper’, as he called it, in Grand Rapids, Michigan, USA. You might recognise the name Bissell, because the name is still seen on cleaning equipment today. Wouldn’t he be proud to see it all these years later still being used?
The first patent for an electric carpet sweeper was granted to Corinne Dufour in Savannah in Georgia, USA in 1890.
Walter Griffiths developed an improved manual vacuum cleaner in Birmingham in England in 1905. The operator pumped a bellows-like gadget that worked to suck dust up through a flexible pipe. This was the first machine that looked like the vacuum cleaners we use today.
ln 1906, a resourceful caretaker called James Murray Spangler created an electric vacuum using an electric fan motor, a large box, a broom handle and a pillow case.
He added a rotating brush to loosen dirt which enabled the machine to pick more up.
He felt the need to invent his machine because he had an allergy to dust – and his job involved cleaning. Anyone who has an allergy like that will know how uncomfortable it is. The pillow case of course was there to collect the dust.
Anyway, he secured a patent for his invention in 1908 and eventually sold it to William H. Hoover (who was his cousin’s husband) – and l expect this is another name you will recognize! Sometimes we even use the word hoover instead of vacuum cleaner – we use it as a noun and a verb.
William Hoover developed the idea further and by 1919 there was a Hoover vacuum cleaner in many, many homes.
The list of different inventions for cleaning up dust goes on and on but to find a vacuum cleaner in almost every home didn’t really happen until the 1950s because before that they were quite expensive to buy.
Sir James Dyson invented the Cyclon which became popular in the 1990s. The Cyclon did not collect dust in a bag that you had to empty, but in the machine itself. These cleaners became very popular in Britain.
Cordless cleaners are cleaners that are charged up with electricity before you use them and can be taken around the house without an electric flex trailing behind the machine.
And now you can buy robot vacuum cleaners that cleverly work by themselves.
They have a docking station where they stay when not in use, and you can set them off to work inside an area that you can define by setting barriers up wherever you want them to be – maybe across door frames.
The robot will work around furniture and curtains and some pets even love going for a ride on them.
Refer to You Tube to see their enjoyment!
Bye bye everyone – don’t forget to subscribe to my blog!
lf you like my blog, please support it by telling all your friends and followers about it.
Thank you!
And see you again next Fun Friday!
Love and kisses
Salty Sam

www.christina-sinclair.com

Bill and Bob’s Joke of the Week![]()
![]()
Bill: Why do aliens need vacuum cleaners in their homes?
Bob: l don’t know. Why do aliens need vacuum cleaners in their homes?
Bill: Because they need something to vacuum up all that stardust!
Salty Sam © Christina Sinclair 2015
Unauthorized use and/or duplication of material from this blog without express and written permission from this blog’s author and owner is strictly prohibited.
Links may be used to www.christina-sinclair.com

Picture Gallery
 Rush mat made by hand
(National Trust)
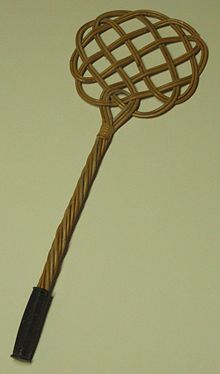 Carpet beater
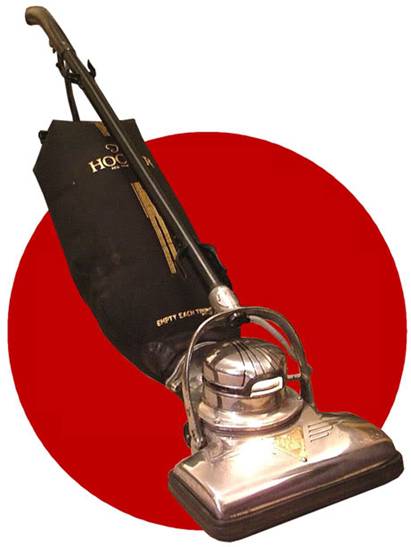
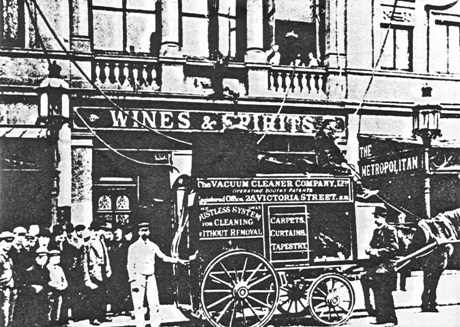 A horse-drawn vacuum cleaner
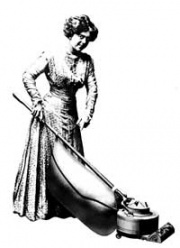 1908 Hoover
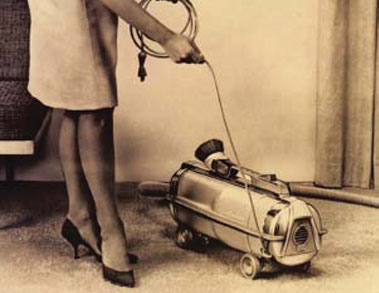 1950s vacuum cleaner
 1960s vacuum cleaner
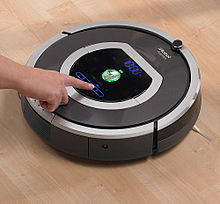 Robot vacuum cleaner
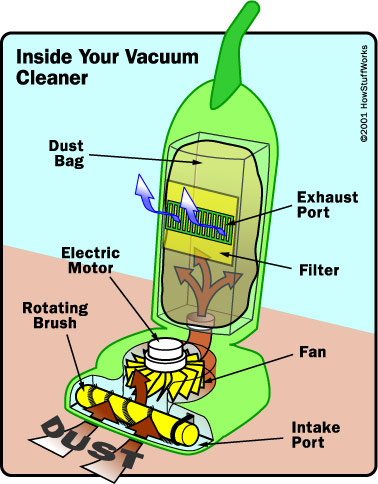 Inside a vacuum cleaner
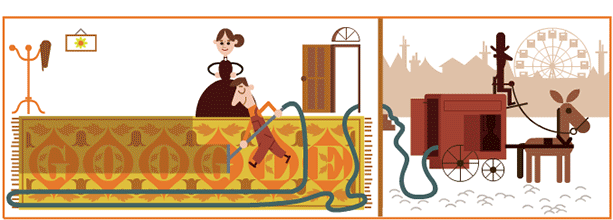 Google produced this cartoon to celebrate 147 years since Hubert Cecil Booth’s birth
 THE SALTY SAM NEWS DESK

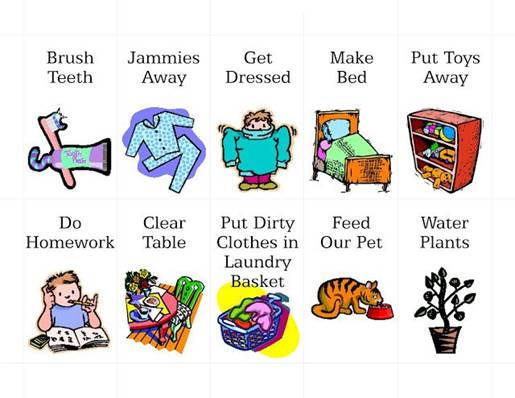
In Bill and Bob’s mum’s never-ending quest for a tidy house, she hit upon an idea that she thought might help get her sons organized.
She designed a chores chart.
She took a large piece of coloured paper and turned it sideways.

She folded it in half along the centre bringing the bottom edge up to the top.
She drew twenty boxes on the chart.
She stuck a picture in each of the top ten squares and cut between the boxes on the bottom half of the piece of paper.
On the underside of the flaps that folded up she wrote in big letters the word DONE.
She put the chores chart on the kitchen notice board and told Bill and Bob that when they had done the things in the pictures they could pin the flap up and cover the picture.
Well, we will see if it works.
You could of course make your own chart too to remind you what you need to do every day and every week.

*********************
TO ADVERTISE ON THIS BLOG
PLEASE CONTACT:
christina.sinclair.ads@aol.co.uk
*********************

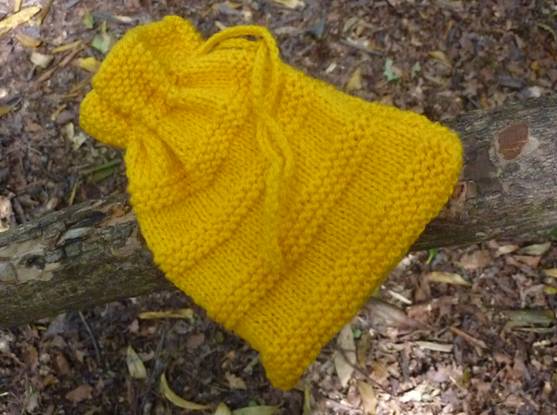
Crafty Tip
And here is a little bag for you to make that you can keep things in.
KNlTTED BAG (KNlT TWO)
Using 4mm knitting needles and dk yarn cast on 30 stitches
Knit 8 rows of garter stitch
Knit 6 rows of stocking stitch
Knit 6 rows of garter stitch
Knit 6 rows of stocking stitch
Knit 6 rows of garter stitch
Knit 6 rows of stocking stitch
Knit 6 rows of garter stitch
Knit 6 rows of stocking stitch
Knit 14 rows of garter stitch
Cast off
TO MAKE UP
Sew bottom and side seams wrong sides together using over-sew stitching
Turn the bag right sides out
Crochet 100 chains into a length of yarn, neaten ends and thread around the base of the garter stitch rows at the top of the bag

lt’s the Weekend!
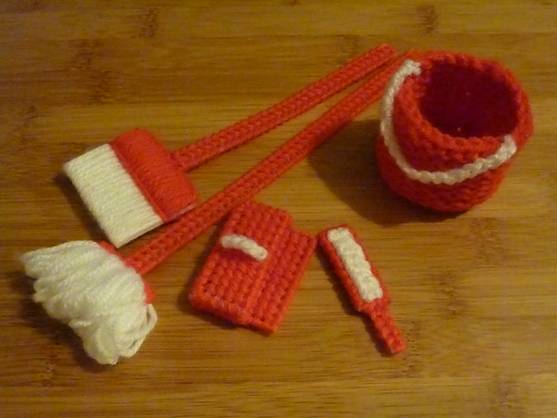
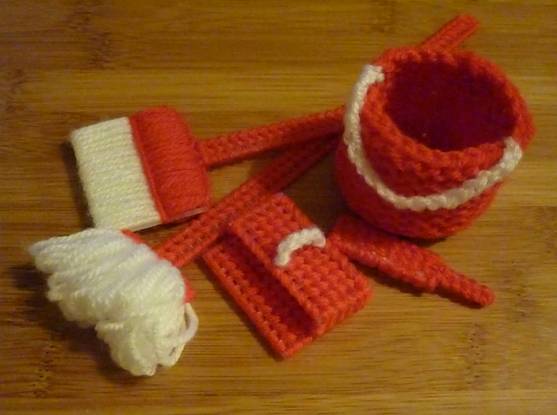
HOW TO MAKE A HOUSEWORK SET FOR A 12” DOLL
You will need 1 sheet of plastic canvas 7 mesh – or left over pieces if you have them
10.5 inches x 13.5 inches/26.7cm x 34.3cm
BROOM
You will need to cut a T shaped panel of canvas
The handle is 33 holes by 2 holes
The head and bristles cover a piece 12 holes across by 8 holes down
THIS SHOULD BE ONE PIECE OF CANVAS
- Sew some white or black bristles onto the base of the broom from the 5th row of holes up and around the base – 3 times in each hole
- Put red stitches down the centre of the handle and then around the edge
- Put 5 strands of red yarn horizontally across the centre of the head of the broom to create some bulk and then sew vertically over them
- Put a strand of yarn across the top of the bristles and secure
MOP
- The handle of the mop is a T shaped piece of plastic canvas 2 holes by 46 holes down for the pole and the head is 8 holes across by 2 holes down
- Sew down the centre of the handle and then around the edge
- Then sew across the top of the head
- Rest a piece of card 2.5cm across at the bottom of the mop and sew across this and through the bottom row of holes and then the top row of holes
- Secure the end of the yarn and then slide out the card to be left with loops of yarn – do not cut them otherwise they will fall out of the mop
BUCKET
Using 4mm knitting needles and red dk yarn cast on 50 stitches
Cast off
Wrap this piece of knitting into a spiral and sew across the disc with a yarn needle and red yarn many times to ensure it is very firm
Using 4mm knitting needles and red dk yarn cast on 24 stitches
Knit 18 rows of garter stitch
Cast off
Sew up the back seam of the bucket and attach the sides of the bucket to the base
Crochet 20 chains into a length of white yarn
Attach the handle to the sides of the bucket
HAND BRUSH
- Cut a piece of plastic canvas into a T shape with a handle 5 rows by 1 hole and the head 9 holes by 3 holes
- Then cut another piece, 9 holes by 3 holes and sew some white bristles into this by sewing crosses along the 2 centre ribs – work 3 layers of crosses
- Sew tent stitches in red yarn over the centre of the back of the brush (the first piece of canvas to be cut) and then along the handle
- Attach the bristles to the brush along the edges of the 2 pieces of canvas using red yarn
DUSTPAN
Cut some panels of plastic canvas:
1 base 11 by 8 holes
1 top 11 holes by 5 holes
1 back 11 holes by 2 holes
2 sides 5 holes by 2 holes
- Cover the panels with red yarn using tent stitching – when covering the base with stitches work up in vertical columns and bring the yarn back down again under the stitches to work up again in order to get a good coverage at the back of the panel
- Crochet 4 chains into a white length of yarn and sew the ends into the centre of the top panel to make a handle
- Sew the panels together and around the edges of the pan
Please note that the material on this blog is for personal use and for use in classrooms only.
It is a copyright infringement and, therefore, illegal under international law to sell items made with these patterns.
Use of the toys and projects is at your own risk.
©Christina Sinclair Designs 2015


Hi best wishes to you and your very nice blog
Thank you
Thank you, I have just been searching for info approximately this subject for ages and yours is the best I’ve discovered till now.
Thank you for writing in Jani!
I must thank you for the efforts you have put in penning this blog.
I really hope to view the same high-grade content from you later on as well. 😉
Thank you! See you again next Fun Friday 🙂
Hi! Someone in my Facebook group shared this website with us so I came to take a look. I’m definitely loving the information. I’m bookmarking and will be tweeting this to my followers!
Fantastic blog and great style and design.
Thank you for writing in – and thank you so much for helping to promote my blog.
l really appreciate it.
Great article post.Thanks Again. Awesome.
Thank you!
I am now not positive the place you’re getting your information,
but good topic. I needs to spend some time learning more
or working out more. Thank you for wonderful info I used to
be on the lookout for this information for my mission.
Good luck with all your plans! And thank you for your comment.
Hello, this weekend is nice designed for me, since this point in time i am reading this great informative paragraph here at my residence.
Well, l am glad to be part of your weekend!
Hope to see you next weekend too! 🙂
My partner and I stumbled over here by a different web page and thought I might as well check things out. I like what I see so i am just following you. Look forward to going over your web pages repeatedly.
Thank you for your comment Myrl!