

Salty Sam’s Fun Blog for Children
Number 263
Ball-Point Pens
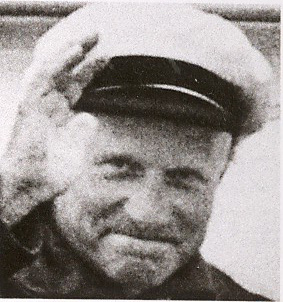
Hello Everyone
l have had such a busy week this week, that my blog post was nearly not written.
l type away late into the night sometimes taking notes from my notepad that l often scribble notes onto beforehand.
That is when l can find a pen. Why do pens always go missing? Do they grow legs and walk off in the night? ![]()
l expect you have the same problem in your house.
l think Barney takes my pens sometimes to play with. l wish he would bring them back again.
l told him that if he doesn’t stop taking my pens, l will have to start using quills instead and so then l will have to start looking for the nearest source of feathers! That will stop him!
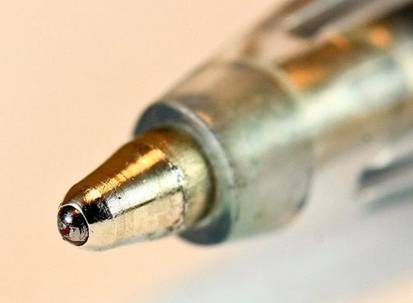
Oh here it is… my trusty biro.
l told you about the history of pens once so that you will already know that the word biro was taken from the man who invented them’s surname.
He was a Hungarian called Laszlo Biro who fled the Nazis after WWll broke out.
He made the first ball-point pen in 1938. He noticed that the ink used on newspapers dried very quickly and didn’t smudge like the ink used in fountain pens.
So he decided to invent a pen that could use the same kind of ink. This ink was thicker than the ink usually used for writing.
lt would not run into the tip of a fountain pen.
And so a different type of pen would need to be invented.
He made a pen with a tiny ball bearing in the tip. As the pen moved along the paper, the ball rotated in a socket, picking up ink from the ink cartridge situated above it and rolling the ink onto the paper.
A man called John Loud had invented a similar device much earlier in 1888 as an instrument to mark leather with but did not develop the idea to be commercially successful like Biro did.
ln 1944, the British Army bought thirty thousand of them so that soldiers could write with them out in the rain. The Royal Air Force used the pens in aircraft. They didn’t leak at high altitudes like the traditional fountain pens.
At the end of the war these pens became popular all over the world. ln 1948, a shop in New York sold ten thousand of them in one day.
The pen has been developed over the years since then.
For example, have you ever noticed that ball-point pens always have a hole on the lid? This is just in case someone has an accident and swallows the top – air will still be able to get through their wind pipe.
And why does it have a hole in the side?
This hole lets air into the shaft of the pen which allows the ink to flow freely – otherwise you would get a vacuum and the ink could not move.
But the fountain pen has never really fallen completely out of favour.
Some people love to do calligraphy as a hobby. This is writing in beautiful script and if you ever get a certificate from school you might have your name written in this kind of writing.
ln 1950, the Frenchman, Baron Bich dropped the end letter from his name and gave it to a pen he was selling to the European market. He had already bought the patent for the Biro pen.
By the late 1950s, these pens held 70% of the European market and you can, of course, still buy Bic pens today. ln fact, they still sell millions of pens every day and still dominate the market.
Over 100 billion Bic pens have been sold but we still call them biros and not bics.
Laszlo Biro not only invented the biro but also had some success as a journalist and a surrealist painter as well.
He died in Argentina in 1985 where he lived.
Argentina’s lnventors’ Day is celebrated on Biro’s birthday which is 29th September.
Bye bye everyone – don’t forget to subscribe to my blog!
lf you like my blog, please support it by telling all your friends and followers about it.
Thank you!
And see you again next Fun Friday!
Love and kisses
Salty Sam

www.christina-sinclair.com

Bill and Bob’s Joke of the Week![]()
![]()
Bill: A patient walks in to see the doctor and says, “Will this ointment clear up my spots?”
Bob: And the doctor says…
Bill: “Well, l can’t make any rash promises!”
Salty Sam © Christina Sinclair 2015
Unauthorized use and/or duplication of material from this blog without express and written permission from this blog’s author and owner is strictly prohibited.
Links may be used to www.christina-sinclair.com

Picture Gallery
 Laszlo Biro
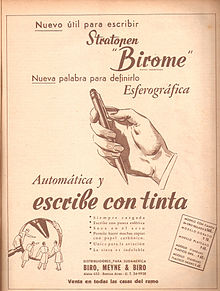 Birome’s advertising in Argentine magazine Leoplán, 1945
 Baron Bich

Calligraphy
 THE SALTY SAM NEWS DESK

Bill and Bob love Harry Potter like so many other children and this week I took them up to London to see some of the sights that have been featured in the books.
If you want to see all of the sights that have been in the films as well, it would be impossible to walk to them all in one day, even if you had really strong legs and comfortable walking shoes on.
We went to see King’s Cross Station where you can find Platform 9¾, The Leaky Cauldron in Charing Cross Road and Tottenham Court Road where Harry, Ron and Hermione escape after the Death Eaters invade Bill Weasley’s wedding.
Locations from the films include: King’s Cross Station and St Pancras International, the London Zoo Reptile House which stood in for the Surrey zoo where Harry let a giant python loose, Leadenhall Market which was Diagon Alley, Borough Market where extra scenes from the Leaky Cauldron were shot (7 Stoney Street), Australia House in Philosopher’s Stone, Claremont Square was Grimmauld Place, Piccadilly Circus, St Paul’s Cathedral geometric staircase appears to Professor Trelawney’s Divination Class, Tower Bridge, Millennium Bridge, Lambeth Bridge where the Knight Bus squeezes between two London Buses, Westminster tube station where Harry and Aurthur go for Harry’s Ministry hearing and Scotland Place where the telephone box that was the entrance to the Ministry of Magic was located.

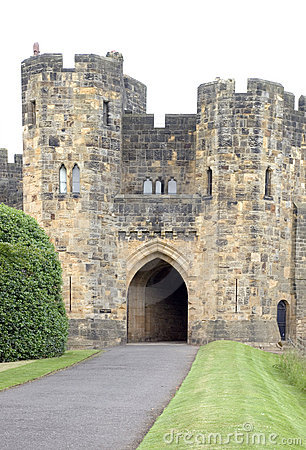
Of course, there were scenes shot in other parts of the country like the Scottish countryside, the Bodleian Library in Oxford, Alnwick Castle and Durham Cathedral.


NEWSDESK MINI MAKE
A 12” DOLL DESK SET
So many people work from home nowadays that they often have a home office to work in. If this is true for your doll she would love to have this wonderful desk set to use.
Just cut the panels to the right size and then cover with tent stitches. Work around the edges with the same or a contrasting colour. Don’t forget to sew the panels together.
12 holes x 8 holes – conference portfolio – 2 panels
6 holes x 6 holes – diary – 2 panels
8 holes x 6 holes – lever arch file front and back – 2 panels
8 holes x 4 holes – lever arch file spine – 1 panel
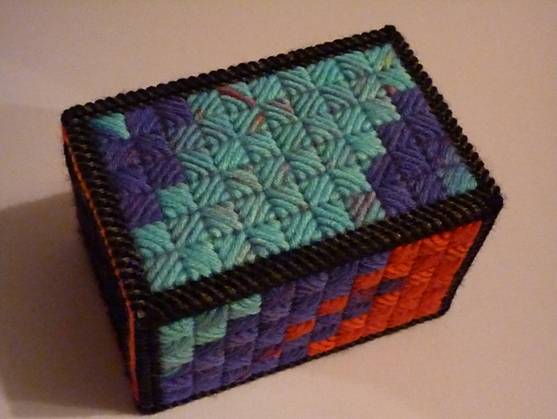
4 holes x 3 holes – pencil box sides – 4 panels
4 holes x 4 holes – pencil box base – 1 panel
TIP
When you cover the panels with stitches, use one piece of yarn so that you don’t have any joins on the inside – if you are careful about the direction you sew your stitches in as you work, you should have the insides of the panels completely covered with yarn as well as the outsides.
You could make pencils by cutting toothpicks to size and painting them, but of course these would not be suitable toys for a small child.
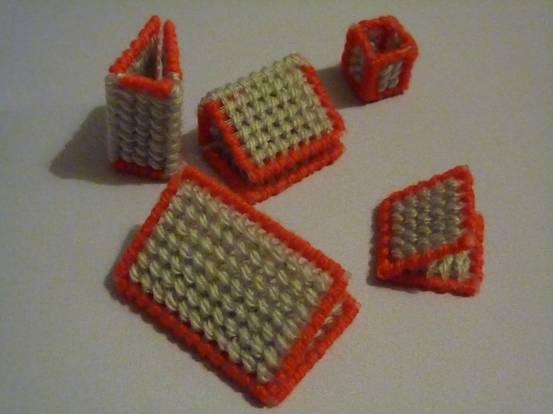
Two lever arch folders, a pen holder, a conference portfolio and a diary
worked in grey and red

*********************
*********************

Hobby Time
Do you know what pointillism is?
lt is making pictures out of lots of dots.
lf you would like to have a go, here are some examples to inspire you…

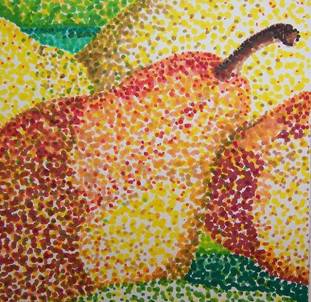
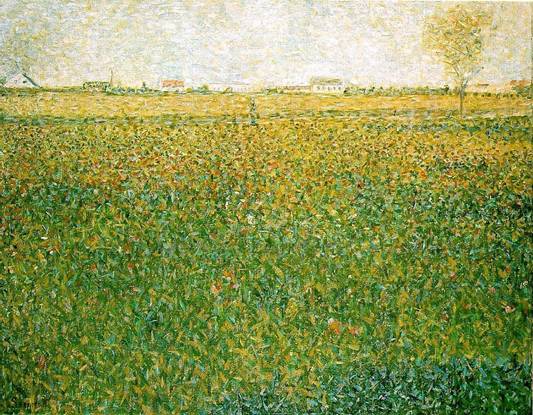
Georges Seurat

Vincent Van Gogh

lt’s the Weekend!

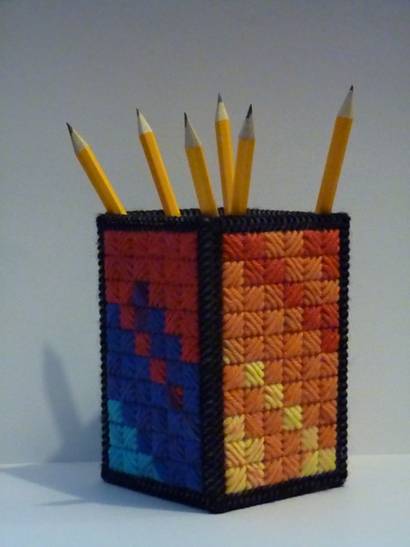
HOW TO MAKE A RAlNBOW YARN PEN AND PENClL POT
And now here is a pen holder for you.
Working with rainbow yarn is fascinating because it changes colour in you hands as you work. You won’t know what your pot will look like until you have finished.
You will need 2 sheets of 7 mesh 10.5 by 13.5 inches/26.7 by 34.3cm
First cut the following panels:-
21 holes x 33 holes – outside side panels – 4 pieces
19 holes x 32 holes – inside side panels – 4 pieces
21 holes x 21 holes – outside base – 1 piece
19 holes x 19 holes – inside base – 1 piece
On the outside side panels:-
Run a line of tent stitches round the outside line of holes using black dk yarn
Fill in the rest of the panel using Scottish stitch and rainbow yarn over 4 holes
You can work up vertically from the bottom or across from the side – the stitches on the pot in the photograph are worked diagonally from one corner. Each line of squares is worked in different directions.
On the outside base:
Run a line of tent stitches round the outside line of holes using rainbow dk yarn.
Fill in the rest of the panel using Scottish stitch and black yarn over 4 holes.
Sew the sides to the base and up the side corners using black dk yarn.
Sew the bottoms of the inner side panels to the inner base using white (or black) yarn.
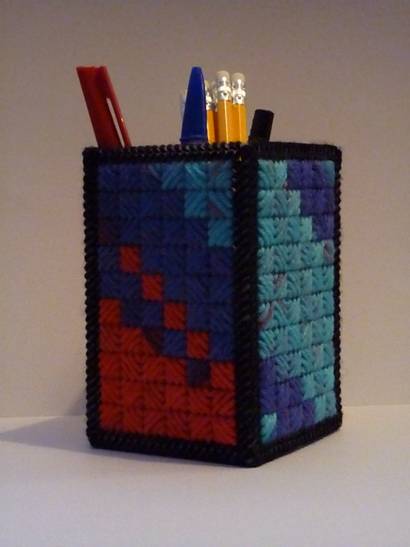
Push the inner skin into the pot and sew along the top of the pot using black yarn to sew the inner pot to the outer pot – sew into just one hole in the outer skin each side as you go because the inner panels are two holes smaller than the outer side panels.
Push a square of card 8cm by 8cm into the bottom of the pot to make it more stable. This card can be replaced if it gets dusty and inky.
You can cover the inner panels with stitching if you want to (maybe black tent stitch) but they won’t really be seen.
Please note that the material on this blog is for personal use and for use in classrooms only.
It is a copyright infringement and, therefore, illegal under international law to sell items made with these patterns.
Use of the toys and projects is at your own risk.
©Christina Sinclair Designs 2015


Good stuff!
Thank you Becky!