
Salty Sam’s Fun Blog for Children
Number 271
Heath Robinson
Hello Everyone
Bill and Bob like to think of themselves as budding inventors.
They say that if you can see a problem in the world and solve it, you can make a lot of money with your inventions.
The first complicated machine to be invented was the clock but since the lndustrial Revolution, one idea has lead to another. Very often inventors carried on the work of those that went before them and some became more famous than others.
Bill and Bob drew some wonderful but outlandish pictures once and when they showed them to their dad he said, “They are a bit Heath Robinson, aren’t they?”
Bill and Bob didn’t know who Heath Robinson was so their dad told them.
He was a cartoonist who was famous for drawing funny and ridiculously complicated machines designed to achieve simple tasks.
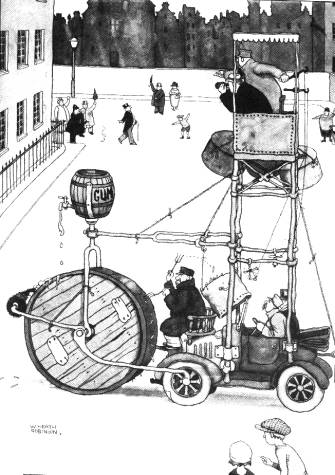
You can see one of his pictures at the top of the blog post. Can you see what the machine is doing?
Nowadays, people usually use the term to describe a temporary fix for a problem using whatever is to hand, like sticks or string or rubber bands.
lf you are camping or broken down at the side of the road, you may have access to only limited equipment.
A lot of Heath Robinson’s cartoons were drawn in the Second World War when people had to make do and mend all the time because of shortages.
Unfortunately, Heath Robinson did not live to see the end of the war. He died in September 1944.
He was born in 1872 in Finsbury Park in North London. His father and brothers were illustrators so it was a bit of a family trade.
His early career was drawing illustrations for books but in the First World War he started to draw cartoons of unlikely secret weapons being used by the military.
ln war, you need all the laughs you can get.
He continued to draw humorous cartoons for magazines and newspapers and in 1934 published a collection of his favourites including an apparatus for resuscitating stale railway scones and a machine that automatically threw water over cats when they were making too much noise.
ln the Second World War, he also drew cartoons relating to shortages.
ln war, you need all the laughs you can get.
His machines often relied on steam boilers, pulleys and lots of knotted string to make them move and they were operated by men who looked as if they might be wayward scientists working in a laboratory.
One of the automatic analysis machines built to help decode messages sent by the enemy in World War ll was named Heath Robinson in his honour. The ideas used to make this machine would later be developed to produce the world’s first programmable, digital, electronic computer.
The Heath Robinson Museum was opened in October 2016 in Pinner in London near to where Heath Robinson lived and worked. lt houses many original artworks owned by the William Heath Robinson Trust.
By the way, did you work out what the machine in the picture is doing?
lt is a car with an contraption attached to it for cleaning cigar butts off the street. Gum drips onto the large wheel at the front to make it sticky. The butts stick to the wheel and a man sitting behind it picks them off with a fork and deposits them in a trash can behind him. Two men aloft are on the lookout for people dropping litter in the street so that the driver can steer in that direction.
The other people in the street are trying to attract the attention of the driver to the place where a cigar butt has just been dropped.
So next time you hear the term ‘Heath Robinson’, you will know all about it, won’t you.
Bye bye everyone – don’t forget to subscribe to my blog!
lf you like my blog, please support it by telling all your friends and followers about it.
Thank you!
And see you again next Fun Friday!
Love and kisses
Salty Sam

www.christina-sinclair.com


Bill and Bob’s Joke of the Week![]()
![]()
Bill: Did you hear about the silly boy who spent a week in a revolving door?
Bob: Why couldn’t he get out?
Bill: Because he couldn’t find the door knob!
Salty Sam © Christina Sinclair 2015
Unauthorized use and/or duplication of material from this blog without express and written permission from this blog’s author and owner is strictly prohibited.
Links may be used to www.christina-sinclair.com

Picture Gallery

Heath Robinson
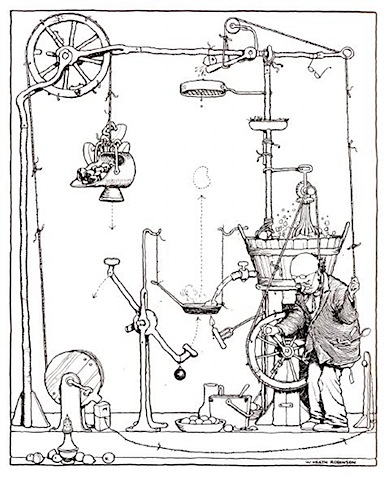 This is a pancake making machine with a built-in lemon squeezer
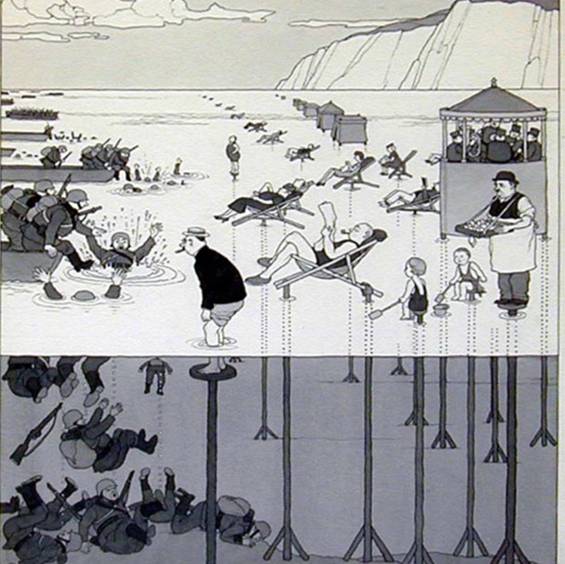 A humorous way to defeat the enemy
 THE SALTY SAM NEWS DESK

This week we have the second half of the quiz that Bill and Bob’s made up for you last week.
Think about the sounds of the things rather than the spellings.
Can you work out the names of the countries?
1.


2.

3.


4.

5.

6.

Ah!
7.

-h

*********************
*********************

Quick Quiz
Can you fill in the gaps to make things to do with Heath Robinson?
- M _ c _ i _ e _ y
- G _ d _ e _
- C _ n _ r _ p _ i _ n
- G_ z _ o
- A _ p _ r _ t _ s
- A _ p _ i _ n _ e
- D _ v _ c _
- E _ g _ n _
- M _ c _ a _ i _ m
- E _ u _ p _ e _ t


lt’s the Weekend!

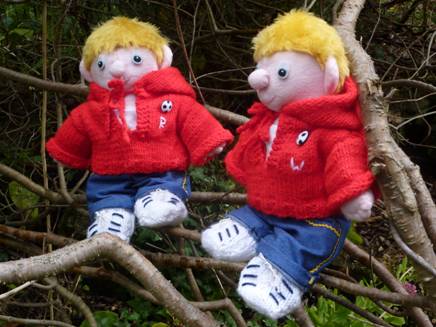
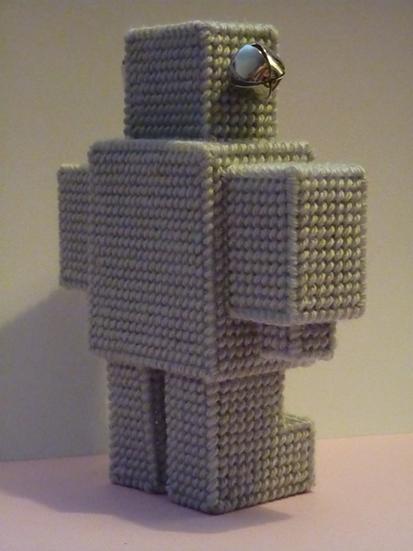
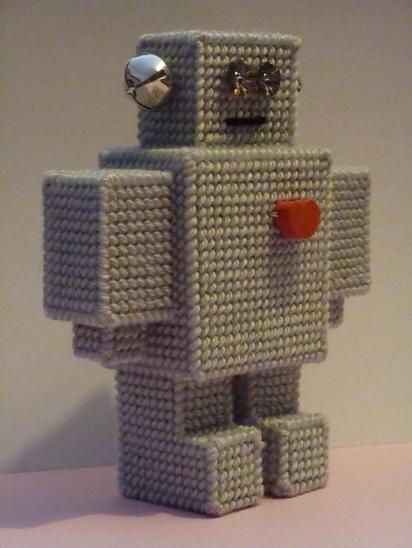
HOW TO MAKE A PLASTlC CANVAS ROBOT
This robot is really cute and although making the panels is very easy, the construction is a little fiddly – so not a project for a beginner.
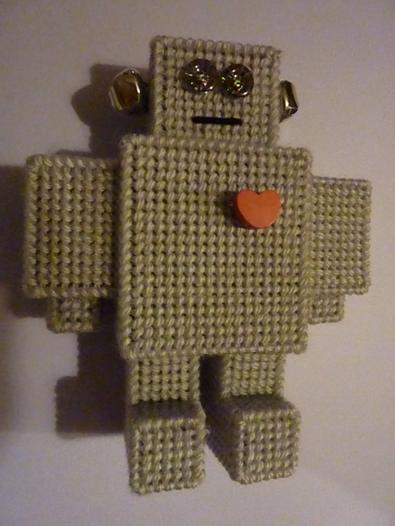
You will only need one sheet of plastic canvas and some grey yarn. How you decorate your robot is up to you.
The one in the photograph has buttons that are 1.2cm across. They have rainbow coloured streaks in them so look sparkly when they catch the light. The mouth is just a length of black yarn, the ears are jangly bells and the heart is a bead sewn onto the chest.

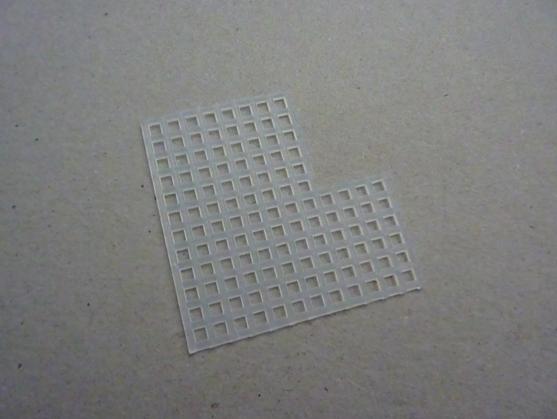
You will need 1 sheet of 7 mesh 10.5 by 13.5 inches/26.7 by 34.3cm
TIP
Make a cutting plan before you start cutting the canvas – use spare lengths of yarn woven loosely into the canvas as a cutting guide – they can be pulled out as you cut the canvas.
Cut the following panels and cover with tent stitch in grey yarn.
10 holes x 12 holes – face and back of head – 2 panels
10 holes x 8 holes – sides of head – 2 panels
12 holes x 8 holes – top of head – 1 panel
18 holes x 20 holes – front and back of body – 2 panels
12 holes x 20 holes – side of body – 2 panels
12 holes x 18 holes – top and bottom of body – 2 panels
6 holes x 12 holes – back of leg – 2 panels
6 holes x 6 holes – front of leg – 2 panels
6 holes x 4 holes – top of foot – 2 panels
6 holes x 6 holes – front of toes – 2 panels
12 holes x 6 holes – soles of feet – 2 panels
8 holes x 12 holes – arms – 6 panels
8 holes x 8 holes – bottom of arms – 4 panels
4 holes x 4 holes – bottom of hand – 2 panels
4 holes x 3 holes – sides of hands – 8 panels
The sides of the legs are 8 holes along the top, 12 holes along the bottom
The backs are 12 holes down
The front of the leg is 6 holes down
The top of the foot is 4 holes along
The front of the toes is 6 holes down
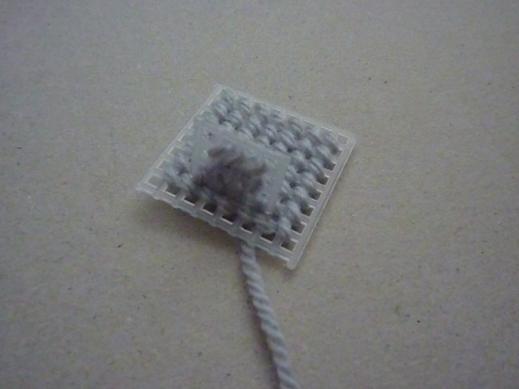
See photograph:-
The side of the leg
TO MAKE UP
- Sew all the decoration onto the panels before you construct the robot except for the ears if they are big
- Sew the 3 front parts of the leg together
- Sew the tops of the leg parts to the base of the body onto the back corners of the panel
- Sew up the 4 side edges of the legs and toes
- Sew on the soles
- Sew the base of the hand parts to the bottom panel of the arm
- Sew up the side edges of the hand and sew the base of the hand into place
- Sew the sides of the front and back arm panels and the arm tops and bottoms to the side of the body panel
- Sew along the corner edges and then sew the outer side of the arm in place
- Sew the base of the head panels to the shoulder panels
- Sew up the side corners of the head
- Sew the ears in place and sew the top of the head on
- Sew the bottom of the body panels to the base of the body
- Sew up the side edges of the body
- Sew the shoulders onto the top of the body
Sewing the bottom of the side of hand panels to the base of the arm panel
TIPS
Watch the direction of your stitches when you cover the panels bearing in mind where they will be positioned. If some of the panels have stitches going in different directions you will create a more ‘cuddly’ effect but if the stitches are all in different directions you may not be happy with the finished result.
When sewing panels on top of other panels bring your sewing yarn up from beneath, sew it through the hole at the bottom of the panel and then put your needle down into the same hole that you came up from in the panel beneath. Keep sewing along and the panel should sit upright and the sewing should look neat.
Make sure that the legs are positioned into the back two corners because otherwise you will not have room to sew between the legs.
Please note that the material on this blog is for personal use and for use in classrooms only.
It is a copyright infringement and, therefore, illegal under international law to sell items made with these patterns.
Use of the toys and projects is at your own risk.
©Christina Sinclair Designs 2015
Answers to the News Desk Quiz
- Portugal
- Chile
- Belgium
- Thailand
- China
- Russia
- ltaly
(The orange flower is called a geum.)

Chilli peppers
Quick Quiz Answers
- Machinery
- Gadget
- Contraption
- Gizmo
- Apparatus
- Appliance
- Device
- Engine
- Mechanism
- Equipment