Salty Sam’s Fun Blog for Children
Number 82
Decorating Wellington Boots
Hello Everyone
Did you go back to school this week?
Did you start going to school for the first time this week?
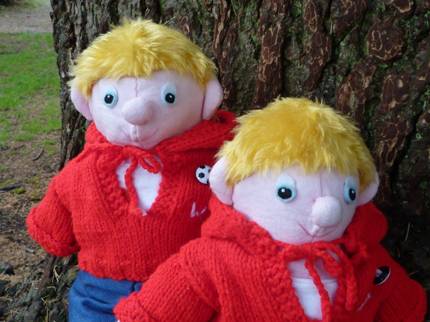
When my nephews Bill and Bob go to school and it going to be a rainy day, they wear their wellingtons so that they can splash through the puddles without getting their feet wet.
Do you know the difference between rain and drizzle?
Rain splashes in puddles and drizzle doesn’t.
Bill and Bob definitely splash in puddles.
The last time they went to school and it was raining, they said the rain was so heavy that they sat in their classroom watching the puddles outside all joining up! ![]()
When it is a snowy day, they wear their wellingtons to stop their feet getting wet; and cold as well.
They wear them when they walk over muddy fields and when they go camping.
When they get to school all the other children are also wearing their wellingtons. They leave them all by the radiator and change into their gym shoes.
The trouble is that the Rocky Bay Shoe Shop doesn’t have a wide range of wellingtons for children. So when it is time to go home it can be a bit confusing with everyone trying to find the right boots!
The children all have a clothes peg with their name written on it to label the boots and keep them together, but in the rush to get home it still isn’t always easy to find your own boots in the scramble.
So Bill and Bob hit upon the idea that they should decorate their wellingtons to make them unique (that means that there aren’t any others that are the same).
You can decorate wellingtons by using transfers or you can paint them with Posca Pens or wellington paints.
lf you are going to paint your boots, firstly make sure that they are clean and dry then stuff them with scrunched up newspaper to make the surface rigid enough for you to lean on.
Draw your design on some paper first to have a really good practice before you start working on your boots.
Bill wanted to paint fish on his because he thought they would feel at home in puddles but Bob wanted to paint suns on his because he said then he would be able to see the sun even on a wet day.
Of course then they wanted the weather to be bad so that they could wear their boots to school and show everyone.
When that day came, Bill and Bob went off to school proudly wearing their artwork and showed the other children what they had done.
And guess what – all the other children wanted to do the same thing.
Bill and Bob had started a craze!
Have you every decorated your wellingtons?
Bye bye everyone – don’t forget to subscribe to my blog!
Love and kisses
Salty Sam

www.christina-sinclair.com
Bill and Bob’s Joke of the Week![]()
![]()
Bob: What did one raindrop say to the other raindrop?
Bill: l don’t know. What did one raindrop say to the other raindrop?
Bob: One’s company, two’s a cloud!
Salty Sam © Christina Sinclair 2015
Unauthorized use and/or duplication of material from this blog without express and written permission from this blog’s author owner is strictly prohibited.
Links may be used to www.christina-sinclair.com
Picture Gallery
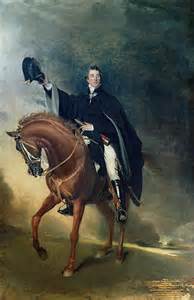
The Duke of Wellington wearing the first ever wellington boots
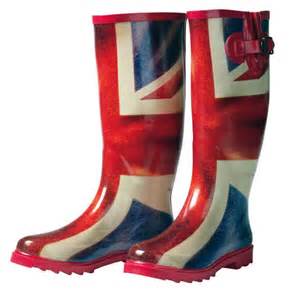 They look a bit different today!
(BHF wellingtons)
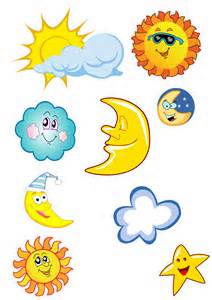
Ideas for pictures – there are also wellington stickers available
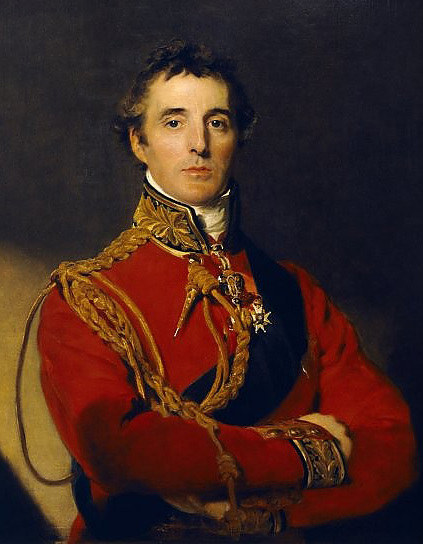 The Duke of Wellington
 Wellington Arch is situated at the back of Buckingham Palace grounds
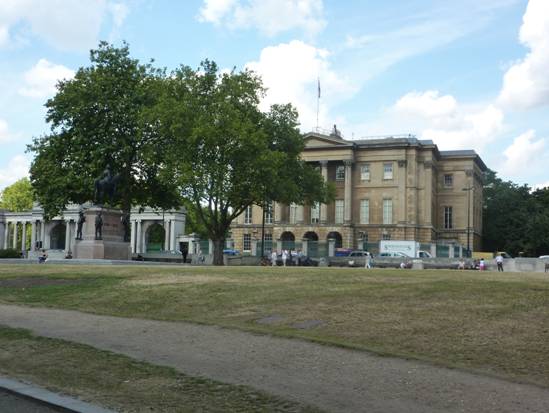 The Duke of Wellington’s house
The address is Number 1, London
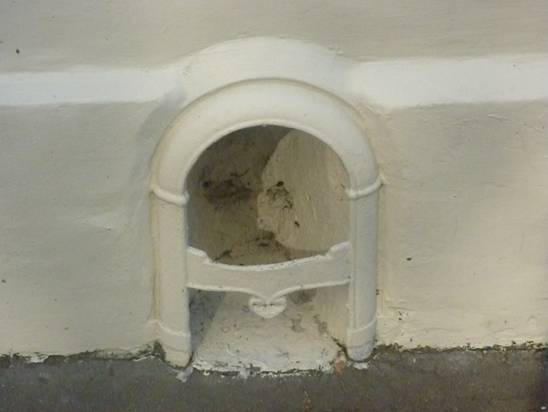
This looks like a little door at the bottom of a wall
In fact it is a boot scraper situated by a front door
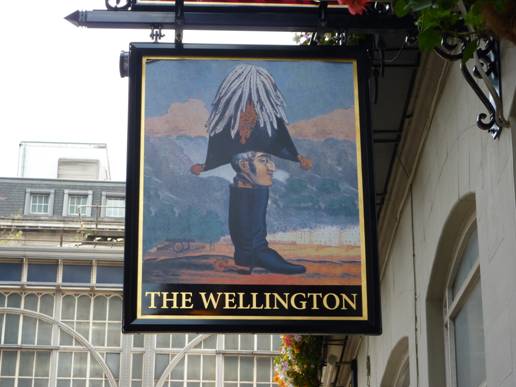 The Wellington Pub opposite Waterloo Station
I think someone doesn’t like getting his feet wet!
 THE SALTY SAM NEWS DESK

When the family go to Auntie Alice’s cottage for the afternoon and it is too cold or wet to go into the garden, we often like to play cards or board games.
This is a fun way for the children to practise using numbers – this helps them in their maths lessons at school. It also brings all the family together.
Bill and Bob also play these kinds of games when they go camping and they have to stay in the tent because it is wet.

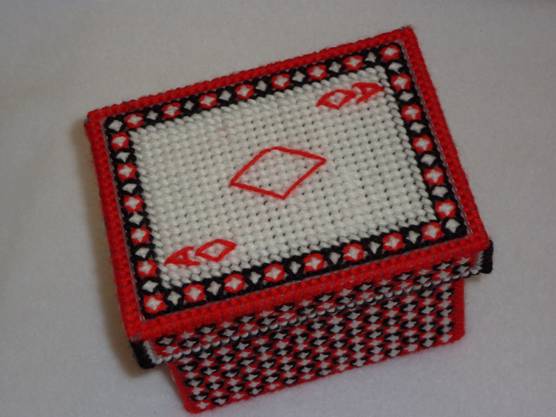
Auntie Alice made this box. It uses the instructions to be found on blog post 40 but the dimensions are given here.
It is big enough to hold a pack of cards, some dice and some small toys collected from the inside of shop-bought crackers that she uses on board games as counters. These kinds of objects are easily lost, but the box is so brightly-coloured it is always easy to find.
NEWSDESK MINIMAKE
A BOX FOR PACKS OF PLAYING CARDS
The box can be made out of one sheet of 7 mesh canvas 26.7cm x 34.3cm/10.5 in x 13.5 in.
Mark out your cutting lines with odd lengths of left over yarn before you start cutting.
You will need 9 panels
35 x 27 holes = 1 lid top
31 x 23 holes = 2 box sides
23 x 23 holes = 2 box ends
35 x 6 holes = 2 sides of lid
27 x 6 holes = 2 ends of lid
The basis of the pattern is a white cross worked over 9 holes – remember to make your stitches lie in the same direction, for example the bottom stitch goes from left to right and the top stitch goes from top to bottom.
+
White cross
The red and black stitches are worked diagonally over the white cross into the centre hole in each side of the nine holes. If you do the red stitches first and then the black, you will get a woven basketwork effect (providing you are working from side to side) in black on the back of your panels, but if you work with the black first and then the red, the inside of the box will be predominantly red.
There is a red square in each corner of the side panels and base but a black square in each corner of the ends of the box. (See the photographs)
Work each square and each panel in the same way and you will have a neater effect at the back of your work.
Use this guide and come up on the odd numbers and down on the even.
5/8
2/7 3/6
1/4
Red and black stitches
Click on the link for the pattern:
82. Playing Cards Box – Canvas Work Stitches
THE LID
- The white panel in the lid is 28 x 20 stitches of half cross stitch and the features of a playing card are embroidered onto the top.
- The border of squares around the card is outlined in back stitch in black yarn. When you bring your needle down into the work, push it to the side of the yarn not through it otherwise the yarn will split.
- A red back stitch border is worked around the line of black stitches.
- The panels of two lines of squares on the sides of the lid are bordered in red back stitch and another line of white back stitch is added on three sides.
- The top of these sides of the lid are attached to the top using red and edged in black down the sides and along the bottom.
THE BOX
- The box panels are put together using red yarn.
- The top is then edged in black.
The canvas work stitches used are simple but the final effect is stunning. They look a little bit like the kind of pattern you might get on the back of a playing card.
These instructions will become clearer, if you look at the finished box in the photographs.
It would probably be easier to make the base and then the lid.
 The top of the lid on the box
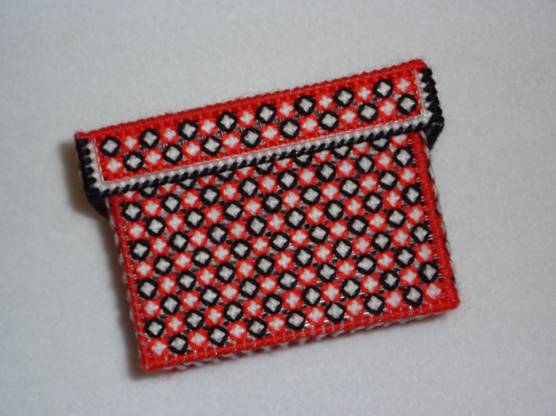
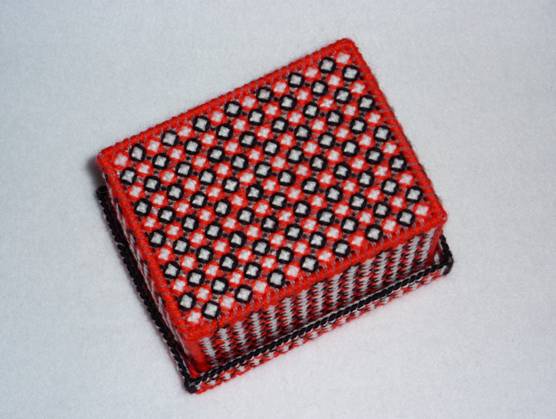
The side of the box with the lid on
 The base of the box
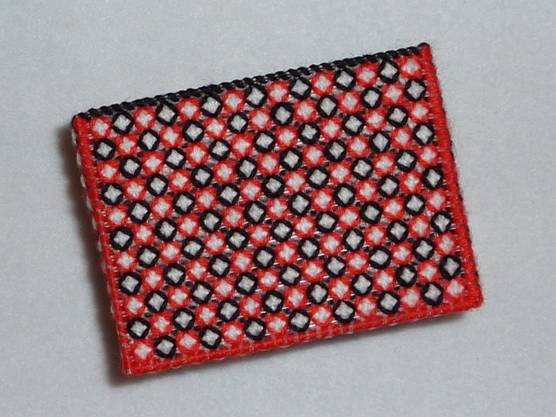
The side of the box without the lid on
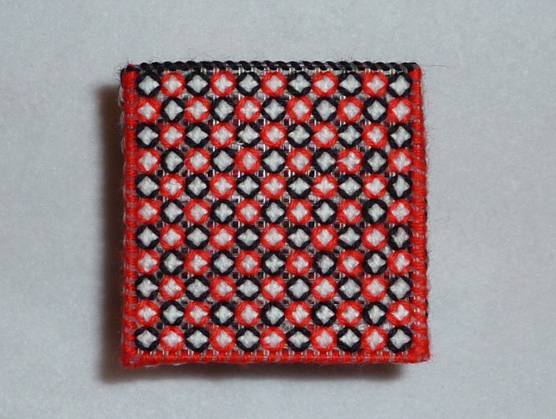 The end of the box without the lid on

*********************
*********************

Quick Quiz
Match these pairs:-
- as white as… a rake
- as hard as… a bone
- as dry as… a brush
- as bright as… a feather
- as plain as… a button
- as fresh as… a pikestaff
- as black as… nails
- as thin as… a daisy
- as light as… a sheet
- as daft as… pitch
- as tough as… rain
- as right as… old boots
BLOW MY FOGHORN!!!
PLUS
Salty Sam fans can join in with their comments and share them with children all over the world. You will need permission if you are not an adult.
Enter your e-mail address to subscribe to my blog and receive new Salty Sam Blog Posts for free by e-mail every week. Your address will be kept private and will not be shared with any third party.
Sign me up at the side bar

lt’s the Weekend!
HOW TO DECORATE SOCKS AND GLOVES
You don’t have to stop at decorating your wellingtons; you can decorate your socks as well if you like.
IDEAS FOR SEWING ON DECORATIONS
Lace around the tops
Coloured cord down the sides, or lines of beads
Motifs, ribbon bows, unusual buttons, tassels or rosebuds on the outside edge of the cuff of the sock
A cross stitch pattern worked onto the knitted stitches of the cuff
(Here are two ideas for patterns)
|
x |
x |
|||||||
|
x |
x |
x |
x |
|||||
|
x |
x |
x |
x |
x |
x |
x |
||
|
x |
x |
x |
x |
x |
x |
x |
||
|
x |
x |
x |
x |
x |
||||
|
x |
x |
x |
||||||
|
x |
x |
x |
|
x |
x |
x |
x |
x |
x |
x |
x |
x |
||||||||
|
x |
x |
x |
x |
x |
x |
x |
||||||||||
|
x |
x |
x |
x |
|||||||||||||
|
x |
x |
x |
x |
x |
x |
|||||||||||
|
x |
x |
x |
x |
x |
x |
x |
x |
x |
Click on the link for the pattern:
Just make sure that everything is sewn on securely and everything you use is washable. Don’t put anything on your sock that will get caught inside a boot, be too bulky and rub on your leg and make it sore.
Also, make sure that whatever you do, your work will stretch when you put your sock on your foot and leg.
Of course, you don’t just wear your wellingtons in the rain; you wear them when it is snowy as well.

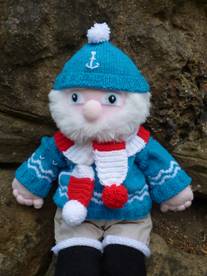
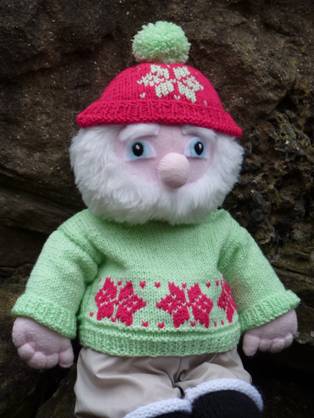
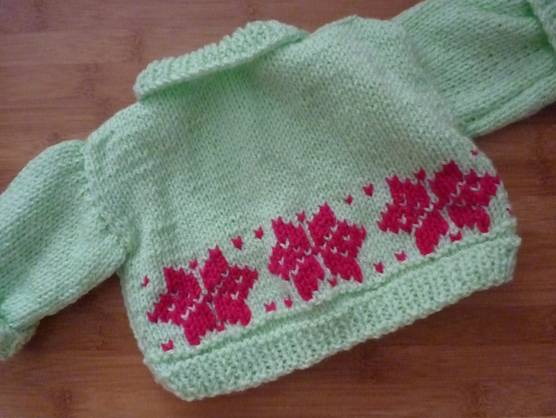
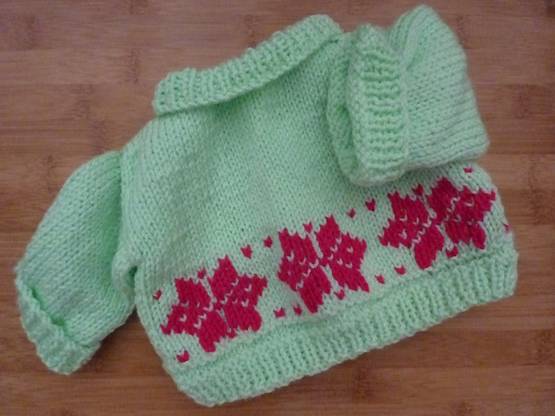
This jumper for your Salty Sam toy has a lovely snowflake pattern on it which can be used to decorate the back of a pair of your gloves or mittens as well.
(The pattern looks like Fair Isle knitting which is a kind of knitting that creates patterns in different colours. The different colours are carried across the back of the work and should be twisted together as you work to keep the back of your knitting neat.
This is not easy for a beginner to do, so this pattern is for Swiss darning which you may find much easier.)
Keep looking at the pattern as you work to make sure you know where you are.
MY SNOWFLAKE JUMPER BACK AND FRONT (KNIT TWO)
Using 3½mm knitting needles and light green yarn cast on 51 stitches
Work 6 rows of 1 x 1 rib
Change to 4mm knitting needles
Purl 1 row, purl 1 row, knit 1 row, purl 1 row, purl 1 row, purl 1 row
Knit 40 rows in stocking stitch
Cast off 12 stitches in the next 2 rows (27sts)
Change to 3½mm knitting needles
Work 8 rows of 1 x 1 rib
Cast off
SNOWFLAKE JUMPER SLEEVES (KNIT TWO)
Using 3½mm knitting needles and light green yarn cast on 40 stitches
Work 6 rows of 1 x 1 rib
Change to 4mm knitting needles
Knit 30 rows in stocking stitch
Cast off
TO MAKE UP
Find the centre of the front piece of the knitting and embroider the snowflake pattern just above the top ridge that runs above the ribbing before you make up the garment.
There are two columns of knitting between each snowflake.
Use over-sewing on the ribbing (wrong sides together on cuffs because they will be turned back) and running stitch or back stitch along the stocking stitch.
Sew along the shoulders and neck (but only 2cm or 1 inch of right shoulder to give room for head when dressing).
Sew tops of sleeves to shoulders, side and under arm seams and sew a snap fastener to the corners of the collar on the outside so that they will not be seen when it is turned over.
TIP
When you wash your jumpers it is a good idea to wash them inside out.
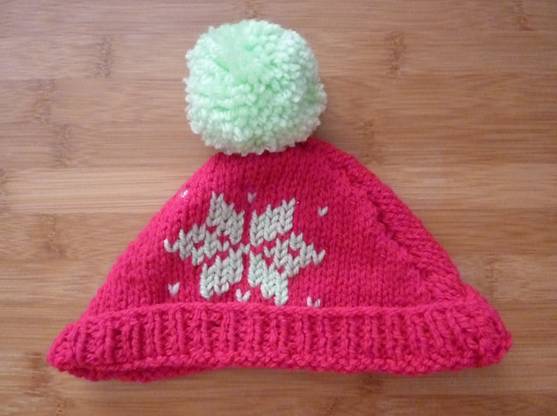
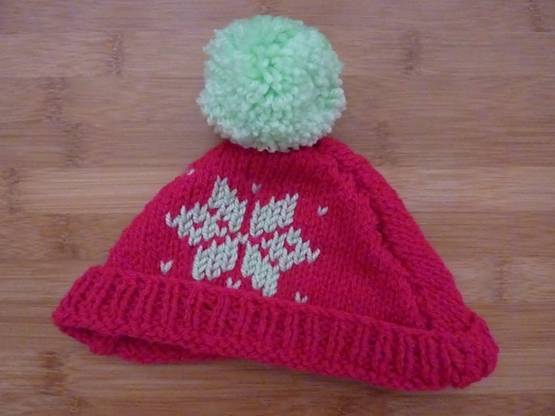
MY SNOWFLAKE HAT (KNIT TWO)
Using 3½mm knitting needles and dark pink yarn cast on 40 stitches
Work 6 rows of 1 x 1 rib
Change to 4mm knitting needles
Knit 8 rows in stocking stitch
Decrease 1 stitch at the beginning of the next 16 rows (24sts)
Decrease 1 stitch at each end of the next 8 rows of stocking stitch (8sts)
Cast off
TO MAKE UP
Find the centre of the front of the hat and embroider the snowflake pattern just above where the ribbing turns back to.
Use over-sewing on the ribbing (wrong sides together on the ribbing because it will be turned back) and running stitch or back stitch along the stocking stitch.
Add a pompom to the top of the hat.
TIP
When you embroider a light colour on top of a dark colour, make sure that you don’t pull your stitches too tight so that they sit well on top of your knitting and won’t let the colour underneath show through too much.
*If you use the snowflake pattern on a pair of mittens or gloves, make sure that you don’t leave loops of yarn at the back of your work to catch your fingers in when you put them on.
|
V |
V |
V |
V |
|||||||||
|
V |
V |
V |
V |
|||||||||
|
V |
V |
V |
V |
V |
V |
|||||||
|
V |
V |
V |
V |
V |
V |
|||||||
|
V |
V |
V |
V |
V |
V |
|||||||
|
V |
V |
V |
V |
V |
V |
V |
V |
|||||
|
V |
V |
V |
V |
V |
V |
V |
V |
V |
||||
|
V |
V |
V |
V |
V |
V |
V |
V |
|||||
|
V |
V |
V |
V |
V |
V |
|||||||
|
V |
V |
V |
V |
V |
V |
|||||||
|
V |
V |
V |
V |
V |
V |
|||||||
|
V |
V |
V |
V |
|||||||||
|
V |
V |
V |
V |
Click on the link for the pattern:
Please note that the material on this blog is for personal use and for use in classrooms only.
It is a copyright infringement and, therefore, illegal under international law to sell items made with these patterns.
Use of the toys and projects is at your own risk.
©Christina Sinclair Designs 2015
Quick Quiz Answers
- as white as a a sheet
- as hard as nails
- as dry as a bone
- as bright as a button
- as plain as a pikestaff
- as fresh as a daisy
- as black as pitch (pitch is like black tar)
- as thin as a rake
- as light as a feather
- as daft as a brush
- as tough as old boots
- as right as rain
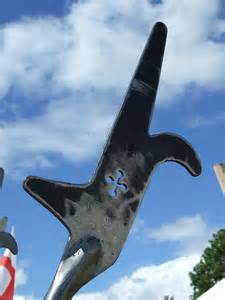
A pikestaff (a type of weapon from history)
A farmer called up to war would take his hedge trimmer to the local blacksmith
to get it transformed into a pikestaff
For an Embroidery Stitches Chart
Check out Blog Post 3