Salty Sam’s Fun Blog for Children
Number 374
Burke and Hare
Hello Everyone
Technology has changed so many parts of modern life that it is hard sometimes to imagine a time when there was very little of it around.
When people learn to be nurses or doctors or even first aid experts they use models to practise their skills on.
Sometimes these models are hooked up to computers so that it is like the students are looking into a body to see what is there and what they are doing to it.
But not so long ago, medical students in classrooms used real bodies to learn about what the inside of a body looked like.
The bodies were of course dead. These bodies were called cadavers.
People could choose to donate their bodies to medical science after they had died. The bodies could have been used for research or doctor/nurse training and were treated with as much respect as possible.
But there was a time, way back in history, when bodies used by doctors were obtained by much more nefarious (under-handed and wicked) ways.
Bodies would actually be stolen from graves!
You will be glad to know that this does not happen anymore.
The practice started after the Judgement of Death Act in 1823 meant that hanging became less common. The number of crimes punishable by death dropped dramatically.
Only the bodies of criminals that had been put to death or died in prison, or suicide victims and orphans could be donated to the medical profession to use for teaching and research before this act became law, and now there was a shortage of them to use.
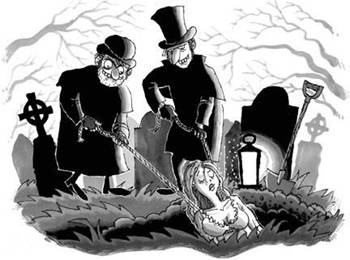
The most infamous (famous for being bad) grave robbers of all were William Burke and William Hare who operated in the dark streets of Edinburgh in 1827 and 1828.
They were two lrish immigrants who came to Scotland and subsequently worked as labourers. They helped to construct the Union Canal and collect harvests in rural Midlothian. This may have been where the two first met.
William Hare then moved to Edinburgh where he ran a lodging house. l am sure that it wasn’t as nice as Mrs Miggins’!
The house was situated in Tanner’s Close in the West Port area of the city.
Edinburgh at the time, as it is now, was a place where a lot of medical research and training went on. lt was also, for a long time, a very important place in the world for studying forensic science.
The cadavers they needed for their research were in short supply in the early 1800s.
Body snatching flourished much to the dismay of the relatives of the recently-departed, and steps were taken to guard the graveyards. High walls and watchtowers were built around many graveyards to make them more secure. Some graves were individually protected by metal cages driven into the ground.
The grave robbers were known as ‘resurrection men’.
ln late 1827, William Burke became a resident in the same street as William Hare’s lodging house.
The two men found out that Robert Knox, a doctor at Edinburgh College, was prepared to pay for illegally-obtained corpses.
The story goes that a resident in the lodging house died owing £4 to Hare and the two men paired up to sell the deceased to Doctor Knox to recoup the money owed. What they actually received was nearly double that amount.
The two men could see there was an opportunity to make money from selling bodies to Doctor Knox and planned to do business with him again.
But after their first transaction they did not want to wait for people to die from natural causes and turned to murder to create a thriving business for themselves.
At first, they chose victims from those staying at the lodging house but then started enticing other people from the area into the house. Here, these poor, unfortunate visitors were murdered, mostly by suffocation.
This method of taking their lives did not leave marks on the bodies and they were ready to be used in the colleges without any sign that they had been unlawfully killed.
At first, Burke and Hare tried to target people who were unlikely to be missed, but eventually became careless through their greed, and some of the bodies were beginning to be recognised. Consequently, gossip spread and suspicions were raised.
Their crimes were eventually discovered when a body was found under the bed of William Burke. The two murderers tried to bribe the witness to keep quiet – without success.
William Hare was granted immunity (let off his crimes) by giving evidence against Burke in court.
lt is thought that probably more than 17 bodies were sold in all.
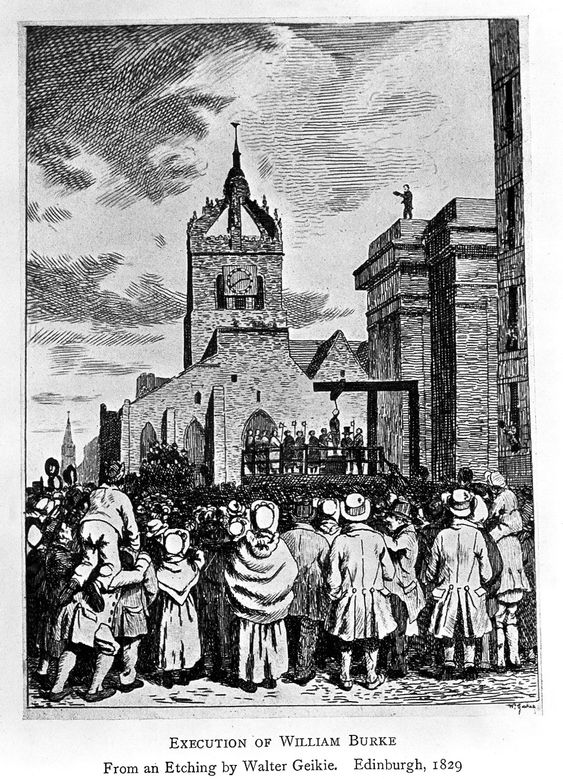
Burke was found guilty and hanged in January 1829 in front of a crowd of thousands.
His punishment did not stop there, however.
He was publicly dissected (cut up) at Edinburgh Medical College and his skeleton is still on display there.
They also made a book with his skin and this can be seen on display in a museum on the Royal Mile in the centre of Edinburgh.
Hare fled to England in February 1829. Nobody really knows what happened to him after that. Rumours say that he was attacked by an angry mob and lived the end of his life as a blind beggar on the streets of London.
Doctor Knox was not prosecuted because it could not be proved that he knew the bodies he bought were murder victims. But his reputation was in ruins so he moved away from Edinburgh. He went to work in London and died in 1862.
After the Burke and Hare Murders, also known as the West Port Murders, another set of similar murders took place in Bethnal Green in London in 1831 and the law was changed in 1832 to stop the trading of corpses.
Medical science would need to get cadavers in another way, and so the Anatomy Act of 1832 was passed to allow for legal donation.
Now cadavers are not needed and computers are used instead.
lf you like my blog, please support it by telling all your friends and followers about it.
Thank you!
And see you again next Fun Friday!
Love and kisses
Salty Sam

www.christina-sinclair.com


Bill and Bob’s Joke of the Week![]()
![]()
Bob: lt says in the Rocky Bay Gazette that police have captured the bank robber they have been looking for.
Bill: Oh, really?
Bob: lt says they found him in a sewer and are holding him – at arm’s length.
Salty Sam © Christina Sinclair 2015
Unauthorized use and/or duplication of material from this blog without express and written permission from this blog’s author and owner is strictly prohibited.
Links may be used to www.christina-sinclair.com

Picture Gallery
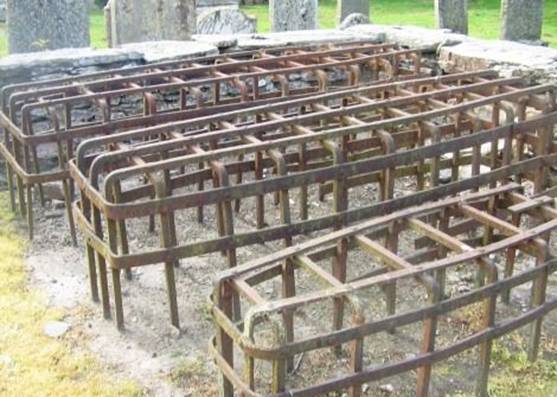
Cages to protect graves
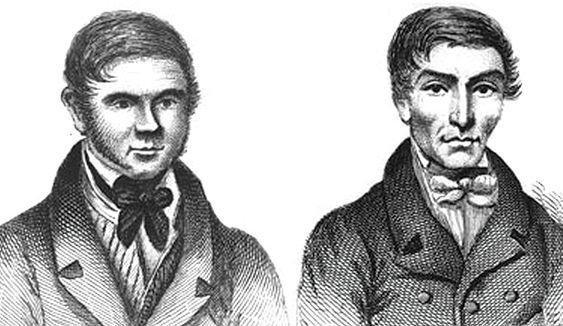
Burke and Hare
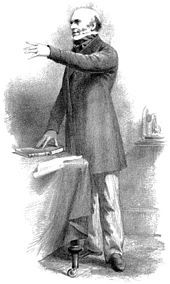
Dr Knox
 THE SALTY SAM NEWS DESK

This week, Bill and Bob’s told me that their swimming lessons at their swimming club at the Rocky Bay swimming pool are going well.
They are now even able to jump off the diving board.
They could not have imagined doing this when they first started in the club.
But bit by bit they worked up to doing it by improving their swimming skills and then building up their confidence.

Happy Easter
Did you know that most sailors through history could not swim? It is often said that Admiral Nelson could not swim.
Nowadays, lots of people who go out on ships, boats and other water craft think that it is a good idea to learn how to swim – just in case…
But before the late 1800s, people thought that immersion in water would bring disease. They didn’t even take many baths because of this belief.
If they fell into the sea, the cold water could cause death through hyperthermia. This was so likely that if they fell overboard, it was unlikely that their shipmates would even bother to try and rescue them.
Captain Cook who sailed thousands of miles around the globe in uncharted waters could not swim. He was killed in a skirmish in Hawaii. His men had brought a boat to rescue him but he did not jump into the water so he could swim to it and reach safety.
Captain Cook
There is a story that the famous sailor Christopher Columbus jumped from a burning ship during a sea battle and swam several miles to shore. He managed to save himself, but his fellow sailors drowned once they fell into the water.
Bill and Bob are very proud of themselves!


*********************
*********************

Hobby Time
lf you grow flowers in your garden, you will probably want to bring some of them into the house to brighten your rooms.
Here are a few tips to make your flowers last in water for as long as possible…
- Your flowers will need fresh water to drink
- lf you cut the bottom of their stalks on the slant, they will find it easier to take up water
- lf the stalks are really hard and thick, they can be bashed or scraped so that they are splintered at the bottom end
- Strip bottom leaves off the flower stalks, because leaves rotting in the water in the vase will make the water murky and smelly
- Trim the stalks longer than you think you will need them and double check the length – you can always trim a stalk a little more but you can’t put a bit back
- Don’t put your vase of flowers in a hot place like on top of a radiator
- You can buy flower food or use a little fizzy lemonade in the water instead
- You must keep your vases clean – you can clean them with baking soda and white vinegar
- lf you use florist foam to push your flowers into, you must tape it into your vessel so that it stays in place – make sure the water level is topped up regularly, the water will be taken up by the flowers and will also evaporate
- Never make your arrangement top heavy; it will tip over


lt’s the Weekend!

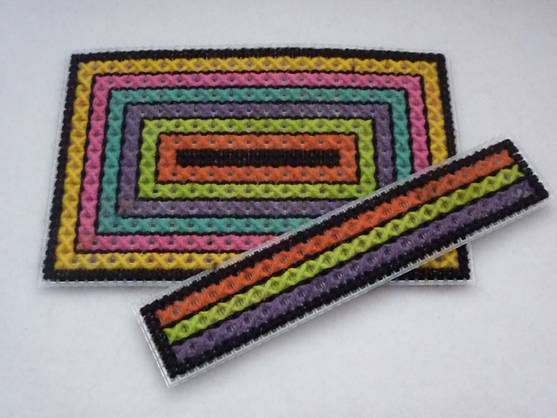
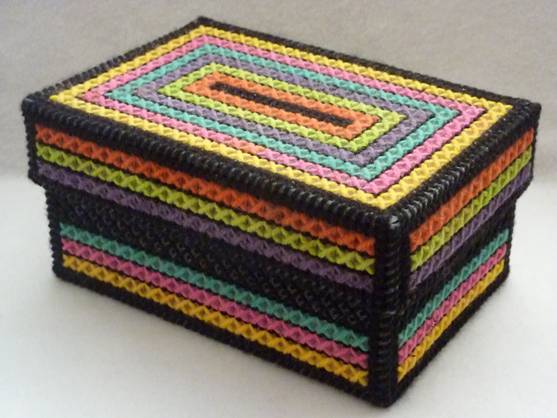
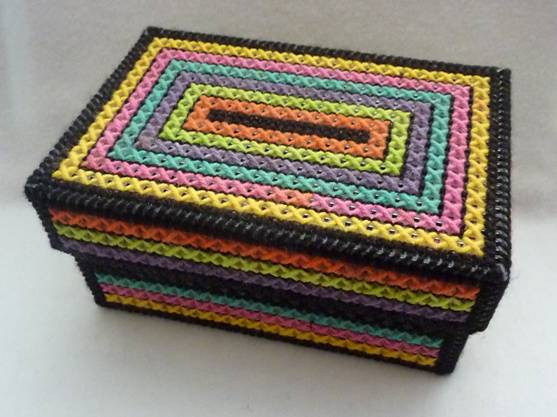
HOW TO MAKE A RAlNBOW-COLOURED PLASTlC CANVAS BOX
TO STORE PENS lN
You will need 2 sheets of 7 mesh 10.5 by 13.5 inches/26.7 by 34.3cm
This matches the notepad cover from Blog Post 361.
If you buy a ball of rainbow yarn you will get several colours within that ball to use. All the lengths of yarn you use will be the same thickness and texture and the colours will match in well together.
There will be a cross-over place where the dye colour changes. You can use this extra colour in your design or cut it out as you choose, but if the colour change does not extend for a very long way down the length of the yarn it will probably disappear when you change colours – because you need a little bit of yarn to sit in your needle at one end and be used up in a knot or a join on length the other.
There may also be patches of colour that have accidentally soaked into the wrong place – don’t worry about this. It is just the character of the yarn you are using.
Use black yarn between the rows of crosses and the colours will really pop.

TIP
If you keep sewing your stitches in the same direction as you work a line of stitches, the back of your work will be as neat as the front.
Cut the following panels:-
Outer lid top 46 x 29 holes 1 panel
Outer lid sides 46 x 9 holes 2 panels
Outer lid sides 29 x 9 holes 2 panels
Inner lid top 44 x 27 holes 1 panel
Inner lid sides 44 x 8 holes 2 panels
Inner lid sides 27 x 8 holes 2 panels
Outer base bottom 44 x 27 holes 1 panel
Outer base sides 44 x 20 holes 2 panels
Outer base sides 27 x 20 holes 2 panels
Inner base bottom 42 x 25 holes 1 panel
Inner base sides 42 x 19 holes 2 panels
Inner base sides 25 x 19 holes 2 panels
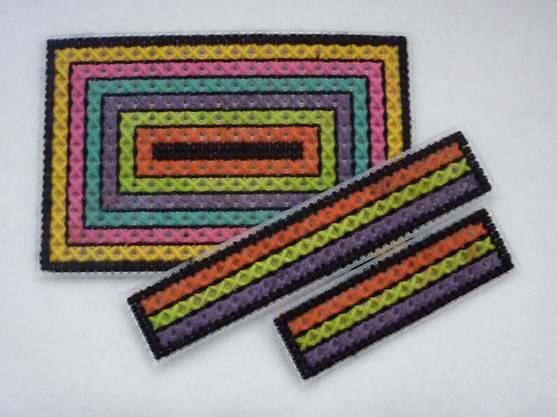
Run a row of small cross stitches around the outside edge of the top of the lid worked in black yarn to create a border
Work 5 strips of coloured cross stitches worked over 9 holes inside that border
Fill the inside void in with more small black cross stitches
Put back stitches between the coloured strips using black yarn
Run a row of small cross stitches around the outside edge of the 4 sides of the lid worked in black yarn to create a border
Work 3 strips of coloured cross stitches worked over 9 holes inside that border
Put back stitches between the coloured strips using black yarn
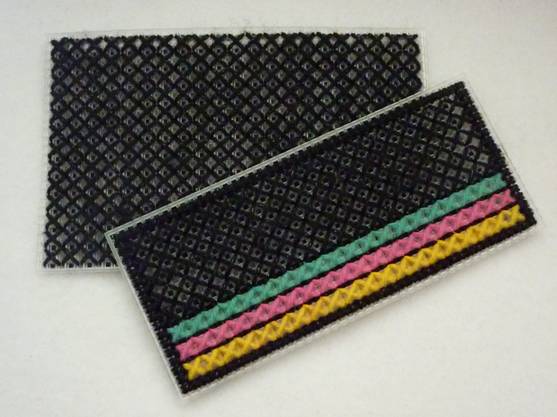
Run a row of small cross stitches around the outside edge of the sides of the box worked in black yarn
Work 3 strips of coloured cross stitches worked over 9 holes above the bottom of that border
Put black cross stitches worked over 9 holes across the whole of the bottom of the box and the sides of the box not covered by the three coloured strips
Put back stitches between the coloured strips and above the top one using black yarn on the box sides
Then…
Work small cross stitches or tent stitches over all 10 inner panels of the box using black yarn
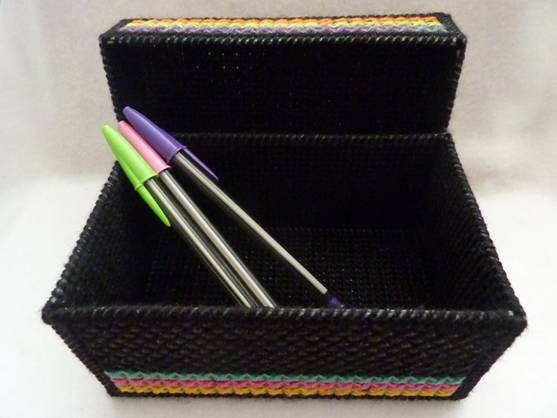
TO MAKE UP
- Sew the sides of the lid to the top of the lid then sew up the corners using black yarn
- Sew the sides of the storage box to the base using black yarn then sew up the corners
- Sew up the inner base to the inner sides and the inner lid top to the inner lid sides but do not sew up the corners – you can cover the edges of the panels with yarn to cover the plastic
- Push the inner skins into place and sew around the rims of the lid and box – you will only sew into one layer of canvas for one hole at each end of the sides
Please note that the material on this blog is for personal use and for use in classrooms only.
It is a copyright infringement and, therefore, illegal under international law to sell items made with these patterns.
Use of the toys and projects is at your own risk.
©Christina Sinclair Designs 2015